Sunday, February 26, 2012

How To Make Raw Marinara Sauce

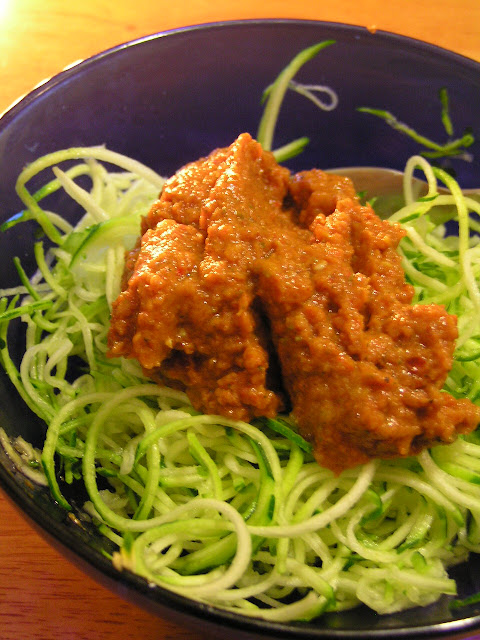
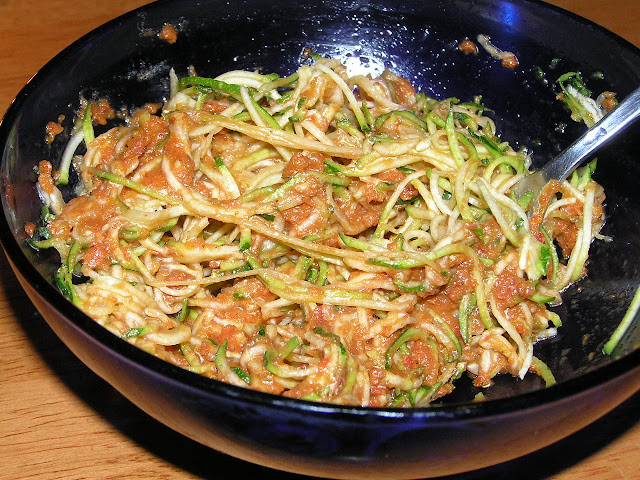
zucchini noodles with raw marinara

I love this sauce with zucchini noodles (find out how to make them here!) but it will work on anything. It's thick and hearty, and really delicious.

zucchini noodles with raw marinara

Place everything in the blender:

1 ripe tomato
1/2 red pepper, seeds removed
1/2 c sundried tomatoes in oil
1 small clove garlic
1 t dried basil
1 t dried oregano
1/4 t salt
2 Tb olive oil
dash pepper

Blend and toss with noodles: Making marinara has never been easier!

Since this is raw, it's best to start with a small amount of garlic, even if you really love garlic; it will overpower the other flavors if you overdo it. Fresh herbs can definitely be used instead of dried; try increasing the herbs a bit if you're using them fresh.

zucchini noodles with raw marinara
Enjoy!
Below are Amazon Affiliate Ads. Any purchase made through them helps support our family. Thanks in advance!
Read More

Friday, February 24, 2012

Raw Zucchini Noodles: Easy & Versatile

how to make zucchini noodles zoodles

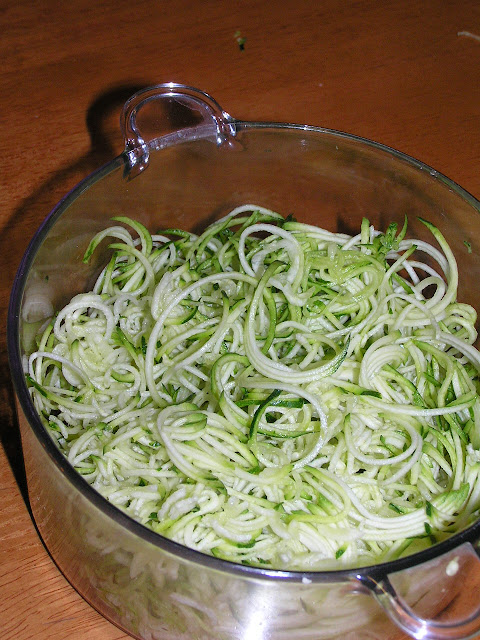
I never cook pasta anymore. Zucchini noodles (also called "zoodles") are quick and easy, and unquestionably healthy. Whether you're paleo, gluten free, diabetic, or just want to be eating more healthy veggies, these noodles are a great addition to your meals. They go beautifully with pesto, marinara, curry, Alfredo, or any other savory sauce you can dream up. What my son is using in the photo above is a spiralizer, or spiral slicer, which quickly slices zucchini into angel hair pasta. It can also make beautiful beet noodles!


zucchini noodles zoodles

You don't need a new gadget to try zucchini pasta though. Before we invested a whopping $16 dollars for our spiralizer, we used a veggie peeler to make zucchini noodles. They turn out wider and flat, like fettuccine, and they work just as well, though the spiralizer is faster.


zucchini noodles zoodles with raw marinara
Try these noodles with this delicious Raw Marinara Sauce!

Zucchini noodles can be made ahead of time by a day or so, but shouldn't be mixed with any sauce until just before serving because salt in the sauce will draw water out of the zucchini. Not having to cook a pot of noodles saves so much time and energy, and I love making such an easy meal that's so vegetable rich.  


zucchini noodles with raw marinara

You probably already have a vegetable peeler; they're available everywhere for a few dollars. We bought our spiralizer online, but I'm sure they're also available at kitchen stores. You can get insanely expensive, giant metal spiral slicers, which probably aren't so much plastic (the only metal bits on ours are the tiny blades). The pricey ones might be useful for other things as well, like slicing fruit for dehydrating, but I like how the small size of our spiralizer fits in our tiny kitchen.

Update: This ad is for the spiralizer I'm using now. It works even better than my original, with more noodle size options, and it takes up less cupboard space!
Do me a favor and use this ad link to check it out; each purchase provides a small boon to our family.


Read More

Wednesday, February 22, 2012

Lacto-Fermented Ginger Ale

lacto-fermented ginger ale

Making lacto-fermented sodas is addictive. It's fun to make things bubbly! Basically, you can turn any sweet tea or juice into a naturally carbonated, healthful soda. We ferment everything we drink these days. It's fun and tasty, as well as healthy! When a friend of mine started making sodas, I was initially like, why would you want to do that? Why replicate something so unhealthy? Little did I know, lacto-fermented sodas are good for you! For more info and inspiration, check out Wild Fermentation! by Sandor Katz.

I am not a fan of store bought sodas, but I do have fond memories of drinking grape soda and rootbeer as a kid. I love that I can make the healthy versions of these kid-friendly drinks! Lacto-fermentation converts sugars to carbon gas (bubbles) and lactic acid, which aids digestion and has other health properties. When old-timers suggest drinking a soda to settle an upset stomach, this is the soda they mean. Plus, yum!

Lacto-fermented ginger ale

How to:

First, make a Ginger Bug (click here for instructions on making your own Ginger Bug, which will assist nearly any fermentation). This is easy, but requires 3 days advance planning. The soda itself will take another 4 days... but don't worry, you don't have to do more than stir it twice a day for 3 days, and then twiddle your thumbs for the final 24 hours while it produces some nice bubbles for you. If you already have a ginger bug in the fridge, wake it up by removing it from the fridge and feeding it some sugar, plus a bit more minced ginger. 

When your starter is bubbly, commence soda making:

Boil 1/3 c sliced ginger for 20 minutes in 2 quarts of water. 
Then add 1 1/2 c sucanat or rapidura (aka: sugar)
Stir to dissolve, then let cool to just warm.

When cool, strain into a one-gallon glass jar.
Add 1 c soda starter/ginger bug and enough dechlorinated water (click here to see how I easily dechlorinate water) to bring the level to about 1" below the shoulder of the jar. If you don't have dechlorinated water, don't fret. The chlorine will naturally evaporate each time you stir your soda, but I still prefer to start with chlorine free water if possible.

lacto-fermented honey wine, kombucha, and rootbeer
Honey Wine, Kombucha, and Soda fermenting on my washing machine
Cover jar with a cloth to keep dust out while it ferments. Stir twice a day for 3 days. On the third day you should be able to hear it bubble vigorously when stirring, and a bit even before you stir. When bubbly, bottle and cap tightly. You can use spring loaded glass bottles, beer bottles with a capper, or simply mason jars, as long as they make a good seal. This is when carbonation builds up. Leave the bottles at room temperature for 24 hours, and then refrigerate. Now it's ready to drink!

If you leave them at room temperature for longer than 24 hours, pressure can build to excessive levels. One batch of soda I made fountained soda out every time we opened a bottle. It was a mess unless we opened them with excruciating care. This isn't something you have to worry about unless you forget and leave your bottles carbonating for too long. Remember- when it's hot out, fermentation speeds up, and your soda may need less overall time before it's ready to refrigerate.

Have fun with it. This is exciting stuff!

Below are Amazon Affiliate Ads. Any purchase made through them helps support our family. Thanks in advance!
Read More

Monday, February 20, 2012

Drink Your Veggies

Drink Me 
Most people cringe when they imagine putting all this in a smoothie. I will say, it helps to have a high speed blender if you're going to blend vegetables. For years we drank a somewhat chunky green smoothie, which our kids especially found unpalatable, but we finally invested in a 3 horsepower Blendtec blender, which can blend anything to a smooth cream. Way worth the investment. However, if you're using a standard blender, just give your vegetables extra time in there before adding softer fruits. I personally don't think it's the end of the world if my smoothie has to be chewed a little, but I completely understand it's not for everyone. The flax seeds and ginger blend up quite nicely as well, though I don't think I would use them in a standard blender.

So yes, a high speed blender will make your vegetables into a smooth drink, but what about taste? I'm not going to drink something every day that tastes nasty and I don't think you would want to either. While carrots have a natural sweetness that goes down easy, the huge amount of greens I add to smoothies would be pretty bitter without some fruit. The sweetness of a couple of ripe bananas really helps, especially in a kale smoothie, which can have a very strong taste. Mango is another great one to blend with greens and other vegetables. Pineapple orange banana is a good combination with greens. When I want to make something really sweet, or if I find myself out of fresh fruit, I'll soak a few pitted dates in some water, then add the dates and their soak water to the smoothie.


Making the smoothie...

Add the following to a large blender, in approximately this order:

  • 1 cm fresh ginger, sliced (leave the peel on if organic)
  • Most of a "bunch" of chard or kale, or 2/3 bag of spinach, or 2-3 heads baby bok choy (remove tough stems from chard & kale, feed to bunnies & chickens or compost. Gently pack the greens in there, because they are why this smoothie exists.)
  • 1 Tb whole flax seeds
  • 1 stalk celery, cut into 2" lengths
  • 1 carrot, cut into 1" lengths
  • 2 bananas
  • Add water to about 1/2 full (I fill the Blendtec to the 28 oz line, use more or less depending on your preference)
  • I also add about a cup of homemade kombucha to each smoothie, but this is not necessary.

Blend on low to get started, then on high for 30 seconds in a high speed blender, or about a minute in a standard blender, until smooth.

Drink immediately, or within 24 hours for maximum flavor and nutrition


We enjoy this every day. Sometimes twice. I often take a quart jar of smoothie with me when I go someplace that I know I'll get hungry. There are a million recipes online for other varieties of green smoothies. I never really follow the recipes for them, but I love to see other ideas of things people have used and enjoy in their smoothies. I encourage you to try this recipe, and then branch out to other vegetable and fruit combinations. If you're squeamish about too many greens, try just adding two large leaves or a handful of baby spinach to a fruit smoothie at first. You'll see it's pretty innocuous; spinach especially blends up smooth and tasty. I think it's really delicious!

Interested in upgrading to a high speed blender? Your smoothies will be amazingly creamy. I don't go a day without using my Blendtec, often twice. Once you try a truly powerful blender, you will never go back! I'm posting the ad link below to my beloved Blendtec, as well as the other leading brand, Vitamix, for comparison. Please check it out if you're interested. Every purchase through my ad link helps provide us with a little bit of income.

Read More

Friday, February 17, 2012

Making A Sourdough Starter

Sourdough starters are available for purchase all over the place, from mail order websites to souvenir shops in San Francisco, but it's super easy to make your own. Once you've made the starter, instructions below, try it out on these whole grain sourdough biscuits!


You literally only need flour and water. Whole wheat and rye flours work great for this, but you could also use white flour if that's what you have. I grind my own flour whenever I need it. It's optimal to use dechlorinated or filtered water (read my post on how to easily dechlorinate your own) but this isn't essential. If you don't have a filter that removes chlorine, you can leave water in a jar overnight and most of the chlorine evaporates out of it. Chlorine in tap water can inhibit the fermentation that we're trying to achieve for the sourdough starter. To read more about my favorite low cost water filter, check out this article.


Covering your starter with a piece of cloth and rubber band allows it to breathe while keeping it clean.

Start with a cup of flour and a cup of water. Stir them together in a jar; the mixture should be thick but runny. If you want it to be ready sooner, you can also jump start the natural fermentation by using some kombucha or ginger bug for part of the liquid, (click the links for instructions on how to easily make your own kombucha or ginger bug).

If you don't use a starter, wild yeasts from the air, from the surfaces of your jar, spoon, and the grains themselves, will find their way to your starter. This is what you want; those wild yeasts produce the gas that allows the dough to rise. Cover your starter with a cloth so it can breathe but stays clean, and stir twice a day for 3 or 4 days. After that it should be bubbly and smell nicely sour.


Leave room in your jar for expansion! Sourdough starter can double in size during fermentation.

It's ready to use in just a few days! I use about a cup and a half per recipe, and always replenish what I remove in order to maintain the starter. If you keep it on the counter, it needs to be fed daily. Feeding only involves adding a bit of fresh flour and water, maybe a half cup each day. Always stir twice a day unless you've got it in the fridge.

Your starter will grow faster in a warm room, but if it's too hot you might have to stir and feed it more frequently. However, if you don't plan on using it again for a while, cap it tightly in a fresh jar, and stick it in the fridge where it will go dormant. It will keep this way for several weeks, and it's always easy to make a new batch of starter if needed.

If you bake seriously large amounts, you may want to have a bigger jar of sourdough starter. The instructions remain the same, just use larger amounts. If it smells bad or is moldy, compost your starter and try again. This could happen if it was contaminated, or if it went too long without being stirred or fed.

For more on traditional sourdough, as well as a whole world of fermentation ideas, check out the original source of my inspiration, two books by Sandor Katz. Both probably available from your local library, but also definitely worth owning. If you buy either through my ad links below, Amazon gives me a tiny bit of cash. Thanks in advance!

Read More

Thursday, February 16, 2012

Making Honey Wine


Every time I mention honey wine, someone thoughtfully corrects me. "Isn't it called mead?" Apparently, wines come from grapes, mead comes from honey, and beer comes from grains. But if that's true, what about Dandelion Wine? I think these definitions are too strict, and a little leeway is needed for the home brewer. Honey wine just sounds so luscious. And it is! This recipe is for Ethiopian Honey Wine, or Tej, which is the first recipe in Sander Katz's Wild Fermentation. His book is an absolute inspiration and I really recommend it. Now for the wine:

For almost all my fermentation projects, I add a little starter (click here to find out how to easily make your own fermentation starter, also called a "ginger bug") to help get things going in the right direction. It's absolutely not required in this recipe, but when I did it by the book, I personally didn't get any noticeable fermentation until I added some of my ginger bug. The traditional ingredients are only water and honey, but raw honey has natural anti-microbial properties that inhibit growth of even beneficial bacteria. To ensure you get a live ferment, add 1 cup of soda starter from your ginger bug. The starter takes just 3 days to make and you can use it forever with some light feeding and proper storage.

I use dechlorinated water (read about how to easily dechlorinate your own water here) for all my ferments, since the intention of chlorine in our tapwater is to inhibit the kind of growth we require for fermentation. Also, I avoid fermenting in metal or plastic, since the acidity of fermentation leeches junk out of those materials. Glass & ceramic are safer for fermentation. I bottle my wine in repurposed glass soda or beer bottles that have a spring-loaded, rubber sealed lid. We bought the soda just for the bottles, which cost more when you buy them empty than we paid for them with soda at the grocery outlet. You can buy bottles like these by the case at brewery supply stores, or use mason jars.

To add a little class to your repurposed containers before bottling your wine, remove the old labels. An easy way to remove labels from bottles & jars you want to use for something else is to lay them in the sink with a soaking wet washcloth over the label, for at least ten minutes. Most labels will slide right off after a brief soaking, though some types of glues hold up irritatingly well to this method.


Supplies you need:
To begin, place honey and water in the gallon jar and stir to dissolve. I will save you the hassle we experienced our first time making this by suggesting you use WARM water to dissolve the honey. Honey just has the hardest time softening in cold water, and honestly getting it to dissolve in cold water was the most time consuming part of making our first batch of wine. Sometimes we just like to do things the hard way ;)

Once dissolved, add your soda starter to kick start fermentation, or trust to the wild yeasts that exist everywhere if you prefer not to use a starter. Cover the jar with a dish cloth, secured with a rubber band, and give it a good stir twice a day. Each time you stir it, you help introduce wild yeasts from the air, and from the surface of the spoon, into your wine. This is why the starter isn't technically needed, but I still like to use it because I know it works and I don't have to cross my fingers that something will happen.

After 3-4 days, depending on the temperature in your house and the yeasts available to your wine, you should have a delicious, bubbling wine base (surely there's a technical name for the wine at this stage?) Using a funnel, pour your liquid into a clean carboy or gallon size apple cider jug. Cover with an airlock or a balloon. Let this sit for 3 weeks or so, until it stops bubbling. I've never used an actual airlock, but presumably you can tell when air is escaping. With the balloon, I simply wait until it starts to shrink slightly. Of course I mark on my calendar to start checking it after 3 weeks. The longer it goes, the less sweet your wine will be, and the higher its alcohol content.


The wine is ready! At this point, we bottle it, stick it in the fridge or a cold, dark pantry, and enjoy. It's light and sweet and a little bubbly, though I'm sure as with all fermentations, each batch is unique. Nik, who is not a wine drinker, really enjoys the honey wine, and it's also gotten great reviews from our friends who are more serious wine drinkers. It doesn't have the tannins or bitterness of a red wine, but is also not heavy or cloying like some dessert wines.

Please refrigerated the finished wine. This method of winemaking does not make wine that lasts forever. It does keep for several months, at least, in the fridge, but since the yeasts are still active, pressure could build up and cause an explosion if not kept cool. Don't worry about it exploding if you keep it cold, though. Compared to the fermented sodas I make, this wine is hardly fizzy at all and doesn't create noticeable pressure in the bottle. It might build up pressure if stored in a warmer area where fermentation could continue unchecked though. It tastes better cold anyway!


After bottling the clear wine, we sampled the dregs. Even the dregs were delicious!

For more on making traditional honey wine, as well as a whole world of other fermentation ideas, check out the original source of my inspiration, two books by Sandor Katz. Both probably available from your local library, but also definitely worth owning. If you buy either through my ad links below, Amazon gives me a tiny bit of cash. Thanks in advance!
Read More

Tuesday, February 14, 2012

How to Make a Ginger Bug Natural Soda Starter

A ginger bug, which is a natural carbonated soda starter, helps to give lacto-fermented foods an inoculation of the right type of microorganisms to get a proper fermentation going. I started using one when I began making lacto-fermented sodas a year ago, but have also found it handy for making honey wine, beet kvass, and anything else that needs a bit of "culture".


ginger bug lacto-fermented soda starter

It's simple to make, and requires only two ingredients: Fresh, organic fresh ginger with the peel intact, and sugar (see note below). To begin, mince or grate about an inch of ginger and add it to a tablespoon of sugar in a quart jar. Stir together with 2 cups of dechlorinated water (read here about how to dechlorinate your own water). Chlorine can inhibit the kind of growth we're aiming for, and it's easy to remove if you plan ahead. In this article, I discuss the merits of an awesome, low tech water purifier that removes chlorine and renders any water safe to drink, or ferment with.

A note on sugar: The natural fermentation that occurs in the formation of the ginger bug will be more successful if it's fed the trace minerals, particularly iron, that naturally occur in unprocessed sugars like sucanat and rapidura. There are lots of variations on these "evaporated cane juice" type sweeteners. If you are using plain white sugar, you should add a dollop of blackstrap molasses once in a while to beef up the nutrients in order to help the ginger bug grow.

Cover your jar with a cloth and rubber band, so it can breathe but stays free of dust and fruit flies. Give the starter a stir twice a day, and once a day add a teaspoon each of sugar and minced or grated ginger. In a couple days it will start bubbling when you stir it, but it's really ready when you can hear it bubbling before you stir it. It takes about 3 days to mature, or longer in a cold room.

I use about a cup of starter liquid for each gallon-size batch of soda I make, or 1/4 cup of starter per quart for smaller batches. Just pour your ginger bug through a strainer into a measuring cup and it's ready to use. Heat will destroy the enzymes, so make sure whatever you're adding it to has cooled to just warm.


Lacto-fermented honey wine, kombucha, and rootbeer
From Left: Honey Wine, Kombucha, and Rootbeer. The wine & rootbeer were both started using a ginger bug.
Replace the water in your starter jar, add some more sugar and ginger, and the ginger bug will be ready to use again in a day or two. If you don't need it that soon, just cap it tightly and stick it in the fridge. Remove it from the fridge and revive it with some more sugar & ginger a couple days before you need it again. It will keep indefinitely if fed and stored properly. When mine eventually got about 1/3 full of minced ginger I found I didn't need to add fresh ginger as often. As long as it's bubbly you know it's active. It should smell gingery; if it ever develops a foul smell, compost it and try again.

Now that you have a lovely, bubbling ginger bug going, Try out my recipe for delicious natural ginger ale. The ginger bug can be used for many other natural fermentation projects, so don't limit yourself to ginger ale. But it's a great place to start!

My friend tried making this from frozen ginger and got no action, so the natural enzymes present in fresh ginger might be deactivated by freezing. Also, I've read that the required enzymes are concentrated in the skin, so I would avoid using peeled ginger, and always buy organic if you can find it.

For more on ginger bugs, as well as a whole world of fermentation ideas, check out the original source of my inspiration, two books by Sandor Katz. Both probably available from your local library, but also definitely worth owning. If you buy either through my ad links below, Amazon gives me a tiny bit of cash. Thanks in advance!

Read More

Monday, February 13, 2012

How To Remove The Chlorine From Tap Water

For years I've noticed people dechlorinating tap water for their plants. My question as a kid was, why are we drinking chlorinated water if it's so bad for the plants? I was always told that plants have more sensitive systems than we do. I'm not convinced that this is true; plants are just more obvious about their ailments than we tend to be. To be sure, chlorine provides no benefit to our bodies, and people are becoming savvy to its dangers. In any case, dechlorinated water is helpful for any sprouting or fermenting project; I use it exclusively, since chlorine would kill the very life that I'm trying to promote. While it's certainly possible to grow sprouts and ferments successfully with normal chlorinated tap water, I think your results will improve with dechlorinated water.

What first got me dechlorinating my water was growing sprouts. I was experiencing what I considered to be a low rate of germination; a lot of unsprouted alfalfa seeds remained at the bottom of the jars. Considering that my seeds were fresh and organic, I had to consider that the problem was in the water. Switching to dechlorinated water made the difference. While there will always be a few unsprouted seeds, most of them should grow when treated properly because that's what seeds do best.

Dechlorination is as simple as leaving a jug or jar or water open to the air, where the chlorine will transform into a gaseous state and float away. It may take a day or two for all the chlorine to escape, but even leaving the water out overnight will remove most of the chlorine. If dechlorinating water for an aquarium, leave it out for two days to be sure none is left to hurt your fish. The water can be left outdoors to dechlorinate, so chlorine gas isn't floating around your house, but I think in a ventilated house, with a few jars of water, it's not a problem to do it indoors.

My simple method for our kitchen water involves two glass jugs, which I rotate. When one is empty, I fill it with tap water, cover with a cloth to keep it free of dust, and leave it all day or overnight, or until my other jug is empty. This is the water I use for drinking, making smoothies, growing sprouts and making fermentations. Boiling is another way to remove chlorine, so I don't use dechlorinated water for cooking. Fancy pitchers are not required; any glass jars work fine.


Check out what kind of cool things you can do with dechlorinated tap water:
Lacto-Fermented Dandelion Soda

Update: I now use this awesome gravity fed stainless steel water filter, which removes the chlorine along with all kinds of other junk. Read about it here. If you're interested in buying it, I'd love if you use my ad link below, since Amazon gives a tiny kickback for a referral bonus. Thanks in advance!

Read More

Saturday, February 11, 2012

How To Find Edible Weeds

I've been very inspired by a friend of mine who teaches classes on wild foraging. I learned that so many of the common plants growing freely in my own yard are not only edible, but delicious, and there is a whole world of edible plants available for free at our local parks and beaches. Melany's classes focus on the edibility of invasive plants. Although many native plants are also edible, it actually benefits our local ecosystem to harvest invasives.

Personally, her classes have given me a new perspective on my own yard. Weeds become a different entity when you consider how nutritious they are! Check out her blog for more info. Here's what we saw today:


bedstraw cleaver edible weeds
Bedstraw or Cleaver (Galleum). While it has velcro-like leaves and stems that stick to each other and to clothing, the young leaves & stems are surprisingly tender and can be eaten fresh or used in salads.
catsear edible weeds
Catsear (Hypochaeris radicata). This is a particularly ugly example. You wouldn't want to harvest it, as it's obviously been stepped on. Better examples are most likely all around you! They are similar looking to dandelion greens, only very fuzzy and less bitter. Add young leaves to salads, or roast & brew the root for a coffee-like drink.


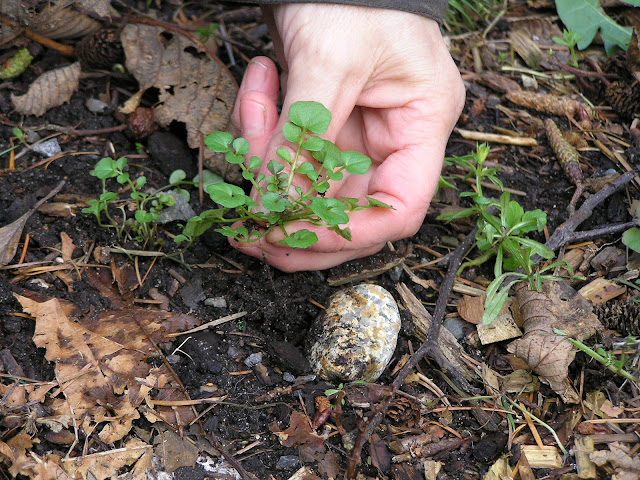
chickweed edible weeds
Chickweed (Stellaria). Entire plant is edible raw in early spring. Very tender and mild.
nipplewort edible weeds
Nipplewort (Lapsana communis)Edible flowers and young leaves.
horsetail edible weeds
Horsetail (Equisetum). This time of year the inedible dead stalks are still standing from last year. Soon though, new asparagus-like shoots will grow in this marshy woodland, and can be eaten raw or sauteed. Peel off outer layer of young shoots to expose the tender middle.
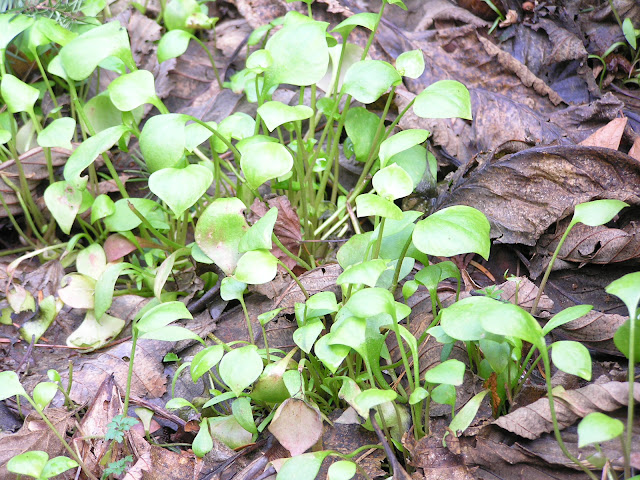
miners lettuce edible weeds
Miner's Lettuce (Claytonia perfoliata). Tender and delicious; leaves, stems, and the tiny white flowers that will soon bloom are edible.
nettles edible weeds
Nettles (Urtica dioica). While this is a great time of year to harvest tender, nutritious young nettles, this particular area had kind of shoddy looking plants. To me the leaves look like serrated hearts. The underside and the stems are covered with stingers, but you can pick a leaf with bare hands, fold it carefully, and chew it up. Fresh nettles taste really good! They can also be blended thoroughly in green smoothies, or cooked in any way you might cook spinach.
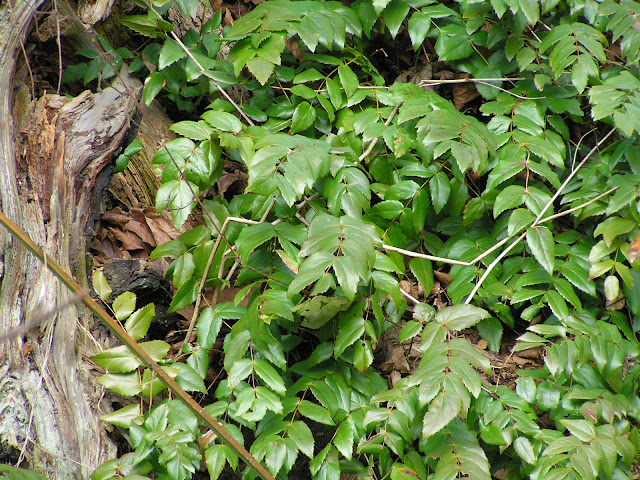
oregon grape wild edible plants
Oregon Grape (Mahonia aquifolium). New leaves in spring, which are a lighter green, are tender enough for salads. Dark blue berries can be used for jams or wines at the end of summer. This plant is native to the Pacific Northwest, so is not really a weed.
salal wild edible plants
Salal (Gualtheria shallon). Another PNW native shrub, but a useful plant to know about. The dark blue berries were described as "better than blackberries," so I can't wait to try them! Fruits in late summer. Tender young spring leaves are edible as well.
shotweed edible weeds
Shotweed (Cardamine hirsuta). So-called because the seeds shoot off of it all over your garden when you come near it. However, the leaves are very tasty, with a slight peppery tinge. Similar in taste to nasturtium leaves, but milder.
sword fern
Sword Fern (Polystichum munitum). It was determined that ferns should be avoided since the young shoots are carcinogenic. I had heard that fiddlehead ferns are quite tasty sauteed, but they should be considered a novelty food. I included it here just so I can remember what this type of fern is called ;)
wall lettuce edible weeds
Wall Lettuce (Mycelis muralis). A bitter green, but that's what salad dressings are for!
water hemlock poisonous plants
Water Hemlock (Cicuta). Poisonous, absolutely deadly. This plant has similar characteristics to the wild carrot, so both should be avoided until you learn to distinguish them carefully. Don't even touch it.
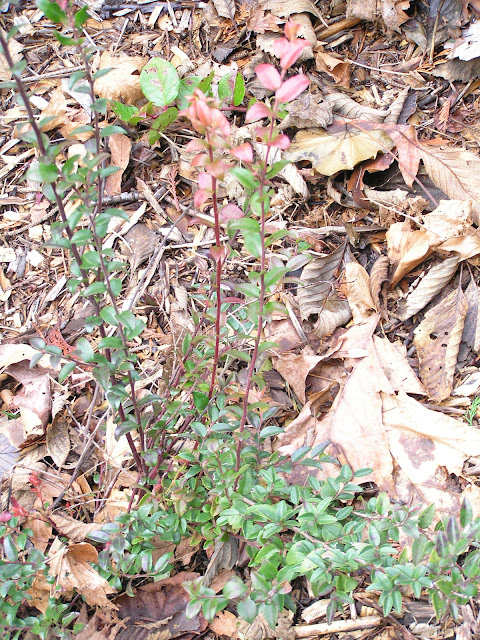
wild huckleberry edible wild plants
Wild Huckleberry (Ericaceae). Another native that we should be very careful with, an important plant for native wildlife.
yellow dock edible weeds
Yellow Dock (Rumex crispus). Use leaves, after removing the tough midrib, for dolmas or green smoothies. Tiny seeds are edible but hard to remove from their sheathes. Chew up a leaf and apply leaf paste to sooth a nettle sting.
Other plants we discussed include the Chinese Coin plant (Lunaria annua) also called Annual Honesty plants because of the translucent seed pods that hide nothing. These weedy plants have gorgeous purple flowers and striking purple seed pods that turn papery when mature. The seed pods are edible when immature, leaves and roots may be edible as well.

Blackberry (Rubus) obviously has edible berries, but the young leaves can also be eaten. I know raspberry leaves make a tasty, nourishing tea and now I want to try making tea with blackberry leaves. Any plant in the rose family has edible leaves, flowers, and fruit.

Indian plum (Oemleria cerasiformis) is another PNW native, and the "harbinger of spring" as its leaves are a sign that spring is here. The white flower cluster looks like a face with two leaves that stick up like floppy rabbit ears. The young leaves are tasty, and the plums are somewhat edible. They have a large pit and are mealy.

Large Leaf Maple (Acer macrophyllum) has edible young flower clusters. They can be stir fried in butter in early spring. It's native also.

Rose (Rosaceae rosa) has edible young leaves, petals, and rosehips. Gather rosehips in fall and press through a sieve with the back of a spoon to remove seeds. Mix with honey for a simple, tasty syrup rich in vitamin C.

Mountain Ash Berry (Rosaceae sorbus) also called the Rowan tree, produces large clusters of bright orange/red berries that can be used for jam or wine.

Hawthorne (Crataegus monogyna) has edible leaves but the pomes, like tiny apples, are mealy.

Skunk Cabbage (Lysichiton americanus) has been used for food in times of starvation, but has very unpleasant, possibly dangerous effects, when consumed due to the formation of oxalic crystals that cut the mouth. Bears use the roots for food in winter, and the plant has medicinal uses.

Snow Berries (Symphoricarpos) have edible, though not sweet, white berries in winter.

Japanese Knotweed (Fallopia japonica) is highly invasive and damaging to salmon habitat. Young asparagus-like reddish shoots can be eaten in spring. Peel outside layer to expose tender middle. Look for shoots near mature knotweed, also called false bamboo because it looks similar to bamboo but is weak and breaks easily.

Douglas Fir (Pseudotsuga menziesii) has soft green tips that can be eaten in June, along with hemlock, pine, and spruce. A delicious tea can be made from the tips of most evergreen trees, but it sounds like Doug Fir is particularly delicious. Someone mentioned making ice cream from it. It has a sweet, lemony flavor. Also the cones from any trees have edible seeds inside, but most are so small they aren't worth harvesting unless you're a squirrel. However, Monkey Tail Trees (Araucaria araucana) have incredibly huge nuts that are similar to pine nuts, though more fibrous and the size of almonds.

Red Flowering Currant (Ribes sanguineum) has edible everything (of course, since it's in the rose family)

This is just the beginning! If you're interested in learning more about this, please also check out my post Wild Foraging in April.

Below are Amazon Affiliate Ads. Any purchase made through them helps support our family. Thanks in advance!
Read More

Thursday, February 2, 2012

How My Family Went Shampoo-Free

You don't have to buy shampoo. Or conditioner. These are products that I thought I could never go without until several months ago, when I first heard about this thing called "no-poo". Since that is a horrible name, I just call it "shampoo-free".

Intrigued by the idea of being free from one more product, I did an internet search to find out exactly how this works. I have naturally oily hair and really don't like it feeling or looking dirty, so I was a bit skeptical that this would work for me. However, I read stories from so many people who had successfully ditched shampoo that I had to try it.


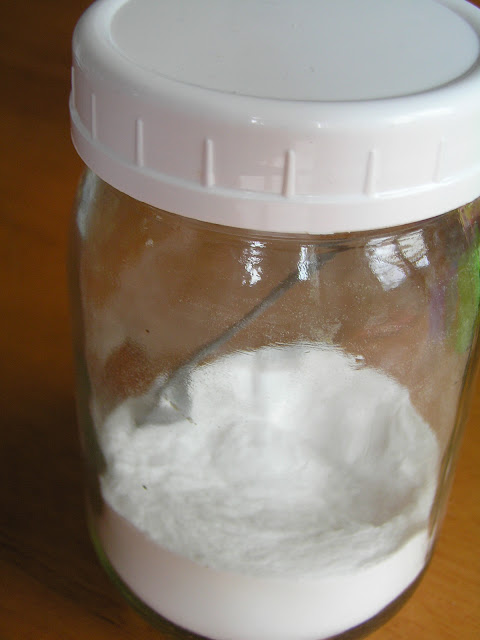
baking soda shampoo
Baking soda cleans gently, but cleans well. Everyone seems to be skeptical at first, but baking soda will not leave your hair feeling greasy or overly dry.
What I could have done:

I found that there are two ways of scrapping shampoo: switching to just water washing, or using a dilute baking soda solution in the shower. With the plain water method, you have to deal with the consequences for a while as your hair & scalp adjust to the sudden lack of chemicals. It may be very oily and disgusting for a few weeks, but in the end you will be product-free. While this is an admirable goal, I could not deal with nasty hair for weeks during the transition off shampoo.

What I actually did:

To spare myself weeks of uncomfortable, oily hair, I went with the other option. I started out, to be safe, using two tablespoons of baking soda each time I washed my hair. I simply put it in a shatterproof plastic cup, bring it with me into the shower and fill halfway with warm water when I'm ready to wash my scalp. I mix it together until dissolved, pour it on my scalp, and massage it in. It's different than shampoo, since it's not goopy and won't produce any suds--but you are not dirty laundry, you don't need detergent on your skin. The amazing thing is how clean the baking soda gets my hair and scalp. It rinses away easily, leaving my hair fresh and clear. I was worried baking soda would be too harsh and leave my hair feeling scrubby and brittle, but I haven't had that experience at all.

I gradually reduced the amount of baking soda I used, and am now down to one teaspoon in a half cup of warm water. Really, that's enough to get clean hair. Nik went cold-turkey right away, because he is a million times braver than I am, and for two months he washed his hair with water alone. He did develop dandruff though, which we were hoping was a temporary condition as his scalp adjusted, but eventually he decided to give the baking soda a try. When he did, his dandruff completely and immediately disappeared. His thick curly hair is amazingly clean and shiny.


clean hair without shampoo

To condition your hair:


Everyone in my family has long hair, and I had serious doubts about our ability to go without conditioner, without suffering some serious snarls. I was pleasantly surprised here as well. The replacement I discovered for conditioner is very diluted apple cider vinegar. I don't like the smell of vinegar, and certainly didn't want to reek of it, so I was a bit skeptical. Also, I have always relied on special conditioners in order to get tangle-free hair. In fact, while I only buy the most natural products for everything else, I have often made an exception for conditioner because I've found that the natural ones just don't work as well.


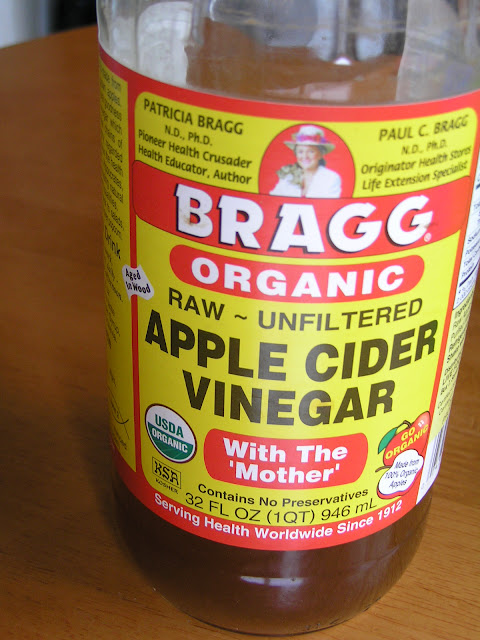
ACV apple cider vinegar for hair

My concern that vinegar couldn't possibly work as a detangler kept me from trying this method for a while. However, there is something magical about vinegar. It's like duct tape: you can use it for anything. Pouring a diluted solution down my hair in the shower and working it in a bit is all it takes for amazingly tangle-free shiny hair. Also, the vinegar smell completely rinses away.


A conditioning alternative:


After using apple cider vinegar for a little while, I got experimental and decided to give my homemade kombucha a try in its place. It works just as well, and the advantage is that I can make it myself at a fraction of the cost of buying vinegar... which is already extremely inexpensive compared to even cheap conditioners. It's definitely a win. (Update: please read here my more recent post on kombucha vs. ACV for hair.)

clean hair without shampoo
We wash our kids' hair with water alone and it works beautifully
This small change feels so much more natural and sustainable to me than being dependent on store-bought shampoo and conditioner. And while there are many recipes and guides to making your own health and beauty products, for me the most liberating thing is finding that we can do without them at all.

I also figured out how easily to make this system portable, for showering away from home. Read about it in this update

We purchase our apple cider vinegar and baking soda in bulk from Azure Standard, a natural foods distributor. Below are Amazon Affiliate Ads. Any purchase made through them helps support our family. Thanks in advance!
Read More