Thursday, May 31, 2012

Eat the Peel

We've all heard that there's more vitamins in the skin of an apple than in the rest of the fruit; I think that's pretty much true for all fruits and veggies. The same beneficial phytochemicals that protect plants from disease also protect our bodies, and it makes sense for the plants to concentrate their protective chemicals in their skins. Why throw all this away?


carrot slices
There's no need to toss any part of this beautiful carrot!
Fruit and vegetable skins are often peeled and tossed, avoided as unsavory because of their tougher texture and more bitter flavor. What is that bitter taste from? Probably all those nutrients. The plant has to protect itself as it's growing, so it puts a god deal of antioxidants on the surface; these same antioxidants are what keep us healthy. 

I personally have never noticed whether a peeled carrot is sweeter than a whole carrot. If you want a sweet carrot, buy local, fresh produce, and don't bother peeling them. Freshly grown produce that hasn't been shipped across the country, or the world, has amazing flavor, with nutrients as well as water content intact, making it crisp and delicious. In the same way that whole grains are better for you than something stripped down to only starches, I think fruits are better for you in their whole form than stripped down to only the sweet bits. In our family, anything we can eat whole, we do.


chopped potatoes
The peels of potatoes help to make them a balanced food. Why waste them? The eyes do need to be cut out if the potato is sprouting, though, because the sprouts are mildly toxic.
Why waste time peeling potatoes? Boil and mash up the skins too, you can handle it. Or, just chop your potatoes and add them to soups, skins and all. This is way easier and more nutrient dense than doing all that tedious peeling! What a timesaver to never have to peel a carrot, apple, or potato. Seriously, apple pies will still turn out delicious with the peels in there. 

There's quite an array of fruits and vegetables that have an edible peel, and it's surprising how many of these commonly get stripped before consumption. Peaches, nectarines, carrots, potatoes, squash, kiwis, apples, cucumbers, and zucchinis... Sure, the peels add a bit of texture that might be weird at first, but chances are, if you're not a toddler, you can handle eating an apple with the skin on.


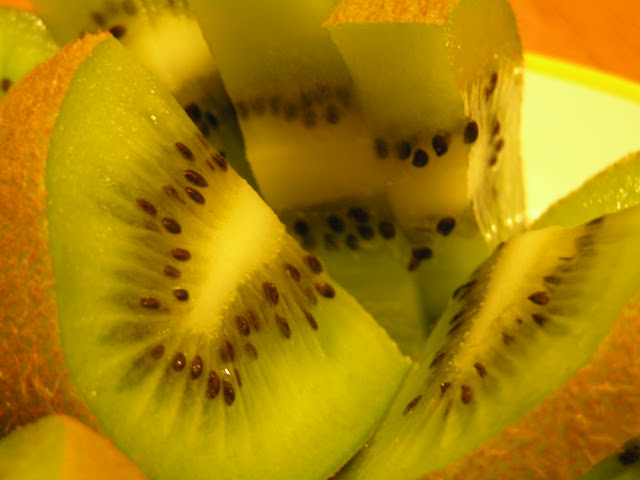
kiwi with the peel
The fuzz won't kill you.
For kiwis, the fuzz can be a bit much. We wash them under running water, rubbing some of the fuzz away and then drying them on a towel, which removes most of the tiny hairs. Slice whole, ripe kiwis up, removing the nubby ends, and enjoy! We do still peel kiwis for the kids, who, after all, have more delicate palates than we do. Peaches and apricots are fuzzy also, but in a much less distracting, and more kid-friendly, way. I think the peach fuzz is part of the experience of enjoying a peach!


mandarin orange slices
Yes, you can even eat mandarin orange peels!
We recently discovered that mandarin oranges are edible in their entirety! Nik and I were very excited to be able to eat the whole orange. The skins have quite a tart taste, but they're still enjoyable if you eat them along with the sweet fruits. My kids have not come around to liking mandarins with peels, but our bunnies will devour any peels the kids leave!

Most oranges do not have such palatable peels. Mandarins are unusually mild and sweet; they don't produce the same strong oils as other types of oranges. Other varieties of orange peels are quite bitter, but can at least be used in teas.

delicata squash
A baked delicata squash can be eaten right along with its peel, or the squash can be scooped out and then the peel can be filled with sliced tomato, sprouts, avocado, and mayonnaise for a bread-free sandwich!

If you're eating the peel of anything, one caveat is to make sure you're eating organic. That is, after all, where the bulk of pesticides and junk will reside if your produce has been sprayed. If you are eating sprayed fruits or veggies, wash very well, or peel if you must. Peels are porous, though, so sprayed fruit will not be completely free of pesticides even after peeling. Eat organic, local food whenever you can.

Also, I should add that while I've heard of people who love to eat mangoes with the peel, I am allergic to an enzyme, urushiol, which is present in mango peels. Urushiol is the same enzyme that enables poison ivy and poison oak to give people contact rashes. For years I actually avoided eating mangoes because I didn't want to risk the blistering rash contact with the skin gave me. However, I've learned that if I carefully peel them, I can still enjoy the fruit. I can touch the peel with my hands, just not with my mouth. Not everyone is allergic to urushiol, but if you have ever had a rash from poison ivy or oak, you should avoid eating mango skins. 

We still peel bananas, since they seem super bitter. If you can eat banana peels somehow, please let me know! Some peels just are horrid, like avocado skins. I'm not encouraging you to eat anything disgusting, after all ;) Trust your gut, but don't be afraid to try new, whole foods!

Below are Amazon Affiliate Ads. Any purchase made through them helps support our family. Thanks in advance!
Read More

Monday, May 28, 2012

Still Shampoo-Free: the Magic of Baking Soda & Vinegar

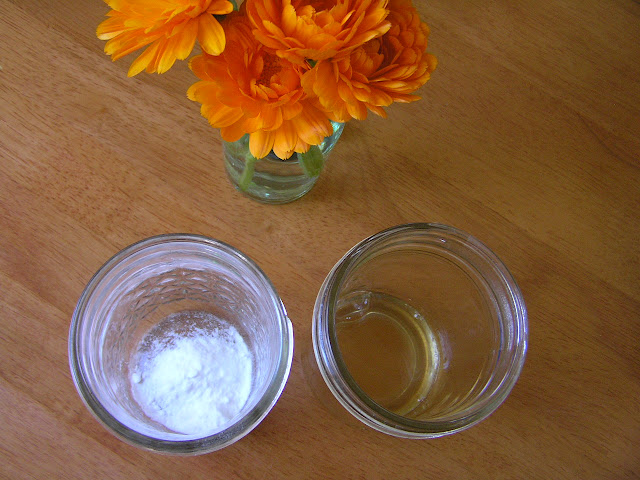
baking soda and apple cider vinegar
Baking Soda & Apple Cider Vinegar
Our family has been completely shampoo free since mid-2011 (read here about how we did it). Instead, we use a baking soda & water solution for washing, and diluted apple cider vinegar for the conditioning rinse. We are totally happy with the texture and cleanliness of our hair, and I really love having less junk I have to get at the store (we never go to the store anymore!) Also, the chemicals in even the more natural shampoos and conditioners are something we are all better off without.

As far-fetched as this idea sounds to a lifelong shampoo/conditioner user, it really works! Our family is composed of several hair types... we all have long hair, mine is very straight and tends to be oily, and Nik's is highly textured and tends toward dandruff. Both of us, as well as our kids, have had a great experience with the switch, and have absolutely no desire to go back to store bought, chemically-loaded products. I was amused, after my original post on our switch, to discover how many people we know that already use one or both of these on their hair. The secret is out! It's great stuff, don't be scared to try it ;)

I do have an update since my original article about ditching shampoo. At the time, I had switched to my homemade kombucha for a conditioning rinse after washing with baking soda. It seemed like a reasonable substitute for apple cider vinegar, and I liked that since I make it myself, it was one less thing to buy. 

However, I discovered a problem after a while- the baking soda wasn't rinsing out completely, leaving traces of white powder in my hair. This was almost annoying enough to get me considering using regular shampoo again. Why was this happening? I realized it had never been a problem when I used apple cider vinegar rather than kombucha, so I went back to that, and the problem disappeared immediately.

I think the kombucha just doesn't have the same properties as apple cider vinegar. Vinegar, as well as closing hair follicles, giving hair shine and releasing tangles, reacts with any remaining baking soda, rinsing it completely away. Anyway, I'm pleased to report that, now that I'm back to baking soda wash with the ACV rinse, my hair is totally clean, healthy, and free of baking soda debris.


shampoo free
Shampoo free family
Baking Soda & Vinegar On The Go:

When I started doing hot yoga at our local Bikram studio, I briefly thought I may have to switch to shampoo and conditioner just so I could have something that travels easily so I could shower at the studio, but then I came up with this easy, portable solution:

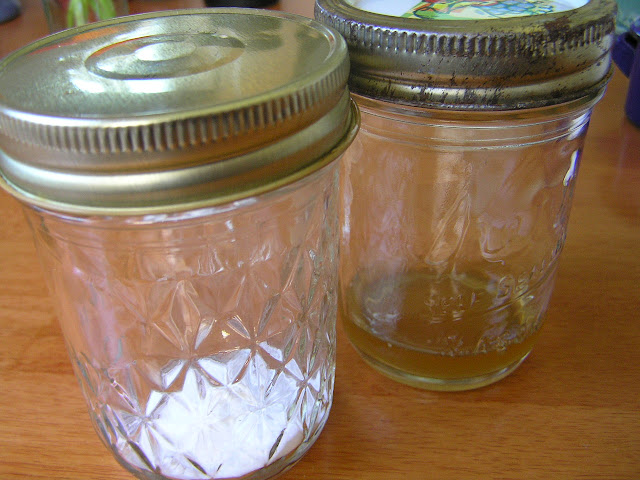
baking soda and ACV
8 oz travel jars: All I needed to make this system portable.

I simply put one scoop (I'm down to 1/2 t) baking soda, and a splash (maybe 1 tb) of vinegar into each jar, respectively. Make sure the jars are sealed tightly, and I'm all set to shower at the gym. In the shower, I add about a 1/3 cup of water to the baking soda, wash my scalp with it, and then dilute the vinegar in the same way for rinsing my hair and scalp. 

Any bottles that you feel comfortable traveling with would also work... just make sure the vinegar container won't leak. I did have this happen, and was worried I'd be stuck with a vinegary backpack forever, but the smell disappeared after about a day. Not too traumatic ;)

Baking soda and apple cider vinegar can both be purchased in bulk from Azure Standard, a natural foods distributor. Below are Amazon Affiliate Ads. Any purchase made through them helps support our family. Thanks in advance!
Read More

Monday, May 21, 2012

Lacto-Fermented Dandelion Soda


Dandelions are probably the most well-known of the edible weeds, probably because they're the most ubiquitous, but they are also one of the most bitter of the bitter greens. They, in a way, give edible weeds a bad name. However, they're extremely nutritious, much more so than any storebought greens, and there are many ways to get past the bitterness, including using the right dressings if they're in a salad, blending them with banana in this green smoothie, or you can use the blossoms, as I will show you here, making an awesome naturally carbonated soda.

When you are ready to try it, first make up a batch of this all-purpose soda starter. It takes three days to make it, but once you have it you can use it for nearly any fermentation and it stores indefinitely in the fridge. What it does is jump start the process, sending your fermentations in the right direction from the beginning.

Fermentation is the process of converting sugar to carbon dioxide (bubbles!), lactic acid, and sometimes alcohol. Fermented foods and drinks are part of virtually every traditional diet, and have so many health benefits. For another fermented beverage that's super easy to make, try homebrewed kombucha!

So, once your soda starter is bubbly and ready to use, it's harvest time. Send your kids out to the yard with a big bowl and have them fill it with every dandelion flower they can find. Children love meaningful work, and this is a fun job for them! The ideal flowers to use are fully open, large and clean, but don't worry about using half open blooms; they will still work.


For a one-quart jar I filled this bowl with probably 5 cups of flowers, easily obtainable every few days in the weed-party that is my yard.

The next step is to separate the petals from the stem and as much of the green part as you'd like. Before making this, I had heard that you could only use the petals, none of the green sepals, and fully separating them sounded so tedious. When I recently read that it's just a matter of taste, that the green sepals impart a more bitter flavor, I readily jumped into the project. I don't mind a bit of bitter, especially when I know the source is so nutrient rich. This is how I easily separate the flowers for my soda:


It's repetitive, but virtually tedium-free. I hold the petal section with my left hand and snip the butt-end off with kitchen shears or a knife. I am totally ok with the little bit of green that remains on the flowers, but if you want an extra step, and possibly a way better flavor, it would be easy to peel the remaining sepals off after making this snip.


In the end, you should end up with about a quart of flowers, and some junk ends to toss to the chickens.

The next step is to pour in boiling water. I have lost a favorite jar doing this, so now I, possibly superstitiously, place a metal utensil in any jar before I pour boiling water in it. Apparently, a spoon or whatever in the jar helps to distribute the heat so it's not such a shock to the glass. To play it even safer, I pour in a little water, let it warm the jar, and then fill it the rest of the way. It sucks to lose a good jar!


Filled and hot, cap the jar and set it aside for about 24 hours to make a strong infusion.

The next step is to strain out the flowers. Just pour through a strainer into a clean quart jar. Squeeze the flowers out, as they hold a lot of liquid.

Now it's time to sweeten it. If you want to use a dry sweetener, like sucanat or sugar, you will need to heat the liquid and stir in the sugar to fully incorporate it. Because I have it on hand, I use agave since it can be added without the extra step of reheating the infusion. Stir in 1/4 c of agave, or 1/3 c sugar.


A few days after starting one jar, I found enough dandelions in my yard for a second batch!

After sweetening, let the infusion return to room temperature if it was heated, and then add about 1/4 c natural soda starter for each quart of liquid. Don't add the ginger bug to hot liquid because heat will destroy the starter.

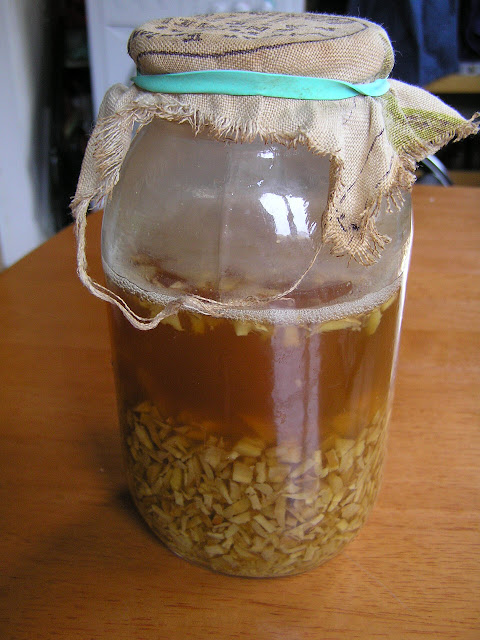
Let this set, covered with a cloth napkin or dishtowel, for 3 days. Stir every 12 hours. Every time I stir a soda, I taste it. It should always taste a little sweet, although this dandelion soda does have a bitter taste as well. If you really think it's turning out horribly, you can always sweeten it more at any point. Fermentation uses up sugar, so it gets less sweet over time.

After 3 days of this, it should be bubbly and ready to bottle. Cap tightly and store another 24 hours at room temperature, in German beer bottles or mason jars.

This last step builds up carbonation so you have a nice, bubbly soda. It's important not to let them go too long or they could explode if enough internal pressure builds up in the bottles. 24 hours will be fine! After this, store them in the fridge, and drink at your leisure. Nik & I hesitantly tried a small amount when we had our first taste... and then we both had a big glass. It's very good, nothing to be scared of, though it does have a mild, bitter flavor and kind of smells like dandelions, for some reason ;)


If you want to try more of a crowd-pleasing soda, check out my recipe for ginger ale. It's easy and unquestionably tasty, whereas the dandelion soda is perhaps more for the connoisseurs and dandelion lovers.

For more info on traditionally fermented sodas, as well as a whole world of other fermentation ideas, check out the original source of my inspiration, two books by Sandor Katz. Both probably available from your local library, but also definitely worth owning. If you buy either through my ad links below, Amazon gives me a tiny bit of cash. Thanks in advance!

Below are Amazon Affiliate Ads. Any purchase made through them helps support our family. Thank you!
Read More

Saturday, May 19, 2012

How To Turn Any Juice Into Lacto-Fermented Soda

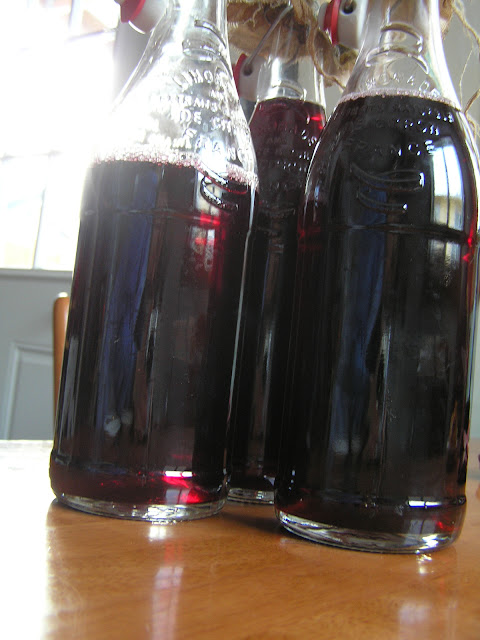
lacto-fermented grape soda

At Nik's suggestion, we lacto-fermented this standard, store bought grape juice that we had in our pantry from our grocery-shopping days (read about how we quit the grocery store here.) The grape soda that resulted was exceptionally delicious, perfectly sweet and bubbly without being cloying like a canned soda. Plus, fermentation greatly reduces the sugar content in juices and increases the beneficial enzymes and lactic acid. 

I like that we took pasteurized juice off the shelf, a basically dead, sugar loaded food (it has no added sugar, but still) and brought it to life through natural fermentation. You really can ferment anything, any sweet liquid can be vitalized this way. Why drink plain old juice when you can make it bubbly, and much better for you?

As a kid, I always chose grape or orange flavors when we were given soda, so I am very excited to be able to make this healthy version. (We haven't tried making orange soda yet, but it's definitely on the list!) One of the things I've noticed with homemade sodas is that they can end up with a little bit of alcohol, some batches more than others. It's never enough that I would worry about my kids having a glass. The health benefits far outweigh any risk associated with this mild alcohol consumption. Most our sodas turn out quite "soft", but alcohol can be a byproduct of this fermentation. If you want to make some actual wine, here's my recipe for honey wine.

lacto-fermented grape soda

How to make lacto-fermented soda from juice:

Start with any juice.

Place it in a glass container. I generally use a gallon jar, but for the batch pictured above I fermented them in German beer bottles, because all my gallon jars were in use. This meant that when it was time to give them a stir, I would cap them and give a couple gentle shakes, since I couldn't fit a spoon in the bottle to properly stir them. Basically, anything goes with fermentation, although I always stick with glass or ceramic containers, since I don't want my fermentations leaching junk out of plastic or metal containers.

Pour in some ginger bug, which is a natural soda starter, and helps safely ferment just about anything. All it takes is fresh ginger, sugar, and three days to make your own by following these instructions. Use about 1/4 c starter for every quart of liquid that you're fermenting.

ginger bug
Everlasting Ginger Bug: feed it occasionally and it will last for ages
Cover your fermenting jar with a cloth, so it stays clean but can still breathe. Stir this mixture twice a day, for three days. I always mark my calender so I don't forget which day to bottle it. The longer it ferments, the less sugar it will have in the final product. Also, a warmer room will cause the rate of fermentation to speed up. It's nothing to worry about, but having so many variables does make every batch of homemade soda mildly different: some sweeter, some more dry, and some way bubblier.

After 3 days of fermenting, bottle it tightly and let it carbonate for 24 hours. I use spring-loaded German beer bottles because they seal so easily, but mason jars work as well. After 24 hours, refrigerate your soda. Leaving it out at room temperature for too long will risk explosion at this point, because this is when carbonation is building up in the bottle. While I've never had a bottle explode, I have had soda that fountained out like champagne when we opened it. It's better to avoid over-carbonating the soda!

You might also like to try my delicious lacto-fermented ginger ale recipe, made from only ginger, sugar, and time.

For more on making naturally fermented sodas, as well as a whole world of other fermentation ideas, check out the original source of my inspiration, two books by Sandor Katz. Both probably available from your local library, but also definitely worth owning. If you buy either through my ad links below, Amazon gives me a tiny bit of cash. Thanks in advance!


Read More

Saturday, May 12, 2012

Making Delicious Hummus From Scratch

homemade hummus

At $4 for an 8 oz tub of organic hummus, keeping my 4 year old in hummus could get expensive. He loves the stuff. I've been wanting to make my own for a long time, but I had some trouble acquiring bulk organic chickpeas, and I wasn't willing to settle for canned beans. You can definitely use canned beans for this recipe though; it will save you some time but add a bit to the cost. I finally got a 25 lb bag of organic chickpeas for $32, so now I'll be making hummus from scratch for quite a while!

I like to give beans a good soaking before I cook them, and for this hummus I actually let them sprout for a day or two first. Sprouting increases digestability and decreases cooking time. It's also easy, though it's not essential if you don't have the time. Some people actually make a raw hummus from sprouted chickpeas, but they are still a bit crunchy after sprouting, which makes a grainy final product, and I wanted to mimic the creamy, smooth storebought hummus as much as possible.

If you'd like to try sprouting them, soak for 10-12 hours, in dechlorinated water if possible (make it easily!) Drain the soaking water and rinse the chickpeas, then continue to rinse every 12 hours for a day or two, until the tails are about half as long as the chickpea. If you're not sprouting, just soak dry chickpeas overnight before cooking them in the morning.


sprouted chickpeas garbanzo beans

After soaking and sprouting the chickpeas, I cook them in a slow cooker on low for about 5 hours, until the beans are tender. It may take longer, depending on the cooker; my slow cooker seems to cook pretty hot. If you haven't sprouted them, they will likely take longer to soften. 

Or, you can speed up cooking by doing it on the stovetop. I prefer to cook in the slow cooker because I can just toss in the ingredients, turn it on, and go on with my life without thinking about cooking for a while. Stovetop cooking requires constant attention and is easier to screw up, in my experience.


cooking chickpeas garbanzo beans

After cooking, let the beans cool and drain the liquid. I simply put my crock pot outside in the night air to cool off, and continue the hummus recipe in the morning. If you have hot nights, it's probably not such a good idea to leave your pot out overnight or you might end up with fermented chickpeas. When I drain the beans I add the cooking liquid to my chickens' food instead of pouring it down the drain. You may want to use some of the liquid in blending up the hummus as well.

Place about 4 cups of cooled, drained chickpeas (if you are starting from canned, this is where you jump in) in a food processor along with:

1/2 c olive oil
2 t salt
2 cloves garlic
1/2 c sunflower seed butter or sesame tahini
Juice of 1/2 lemon (optional)

I use sunflower butter because that's what I generally have on hand, and it tastes delicious in the hummus, but if you want a more traditional flavor use sesame tahini insead.


how to make hummus
Chickpeas, Olive Oil, Sunflower Butter, Garlic & Salt is all it takes!

Blend everything together until it's creamy smooth. At that point, it's ready, and it's delicious, and it costs pennies rather than dollars, and it didn't come in any wasteful packaging.

This hummus freezes well, so I always make a double batch and stick some in the freezer for later. If you have some extra chickpeas after making this recipe, try roasting them for a delicious, simple and healthy snack; follow the link for instructions.


homemade hummus with veggies
Enjoy with veggies, crackers, or whatever!


We purchase organic garbanzo beans in bulk from Azure Standard, a natural foods distributor. Below are Amazon Affiliate Ads. Any purchase made through them helps support our family. Thanks in advance!
Read More

Tuesday, May 8, 2012

Making Lacto-Fermented Sauerkraut


Homemade, lacto-fermented sauerkraut is vastly, wonderfully different than storebought. I have always been a fan of sauerkraut, but now that I make it myself I absolutely love it and it's become a regular part of my diet, no longer just some novelty to eat with the occasional bratwurst.

Raw, naturally fermented foods are great for digestion, and this homemade sauerkraut makes a great snack when you crave something crisp and salty. In a few weeks you will have about a half gallon of sauerkraut for the cost of two heads of cabbage.


Purple cabbage stays firmer during fermentation; green cabbage become softer, more like the texture of storebought, cooked sauerkraut. Because I love the color, and the nutritional profile, of purple cabbage, I like to use one head of each type in my batches of sauerkraut, for a gorgeous shade of bright pink.

Start with about 5 lbs of cabbage, or 2 medium-sized heads. Remove or wash outer leaves, and chop cabbage into shreddable chunks, discarding the core. Shred however you prefer; I use a food processor with a slicer blade.

Mix all the shredded cabbage in a large crock with 3 Tb sea salt. This is where it gets messy! If you're using purple cabbage, your hands may get a bit stained, but you'll survive. I use one hand to mix, keeping the other clean, but use both if you want to really get in there. The cabbage needs to be squeezed and mashed and pressed, together with the salt, until it releases enough of its own juices to fully immerse itself.


Two heads of freshly shredded cabbage, plus 3 Tb salt. You can see how my 4 qt crock is full to the brim; after kneading it well, the crock will only be about half full.

Recently I've learned to first knead it a bit with the salt, and then let it sit for several minutes to allow the salt to do some of the hard work for me, drawing out the water from the leaves. Then, after a relaxing break to check my email or whatever, I get back in there, pressing and squeezing until I can punch the cabbage down below the level of the liquid.

If enough liquid cannot be obtained this way, like if the cabbage is a bit old and dehydrated, you can mix up some brine by dissolving a teaspoon of sea salt in a cup of water. Pour this over your cabbage in the crock. Don't give up too easy, though. Most of the time, you will not need any added brine.

While it's possible to make salt-free sauerkraut, the added salt helps to ensure that only our desired bacteria grows, resulting in a beneficial lacto-fermentation rather than an icky putrefaction. If the fermentation goes "off" for some reason, it will smell bad and taste worse; you will know it. However, I often don't much like the smell of sauerkraut right when I take it out of the crock; it often seems to need a week or two in the fridge to mature. At that point, it's always delicious! So, don't despair if your kraut smells not-quite-right when you take it out of the crock, some time in the fridge will fix it up.

Using a clean crock, clean utensils, and clean hands will go a long way toward ensuring a clean ferment. Also, I always use dechlorinated water (see here for my easy how-to if you don't have a water filter) for fermentation, since the intention of chlorine in tapwater is to kill organisms, and when we ferment we are trying to actively culture healthy organisms.

This next part is why I avoided trying to make my own for a long time: The cabbage must be weighted down in a sort of elaborate way, so air can't get to it. I simply use an old, round crock pot and a small plate that fits right inside. If your crock pot is the oval variety, you will need to find a different container. It should be something cylindrical and ceramic or glass.


Crock with small plate covering kraut, with a large jar weighing down plate so the liquid is always above the level of the cabbage.

So, the plate goes on top of the cabbage, and is weighted down with a full gallon jar. You could probably get away with a smaller jar, filled with water. It just has to be heavy. Try using a large boiled rock instead, if you want to be rustic.

Then, over top of all that, goes a dust cloth. My friend uses a pillowcase, which I think is a good idea, but I can never be sure that there's no lint in the corners of my pillowcases, so I just stick with a tea towel, wrapped and pinned like a little nappy. The cover is important in keeping the fermentation clean and allowing it to breathe.


Fermentation in the crock takes 3 weeks; I always mark my calendar. You don't have to do much during this time except check under the cloth occasionally, weekly really, for any escaped bits of cabbage or spots of mold. Using a butterknife, collect any debris or foam forming on the surface of the brine. The first time I made sauerkraut I totally skipped this step and it worked out fine, but I like to do this little maintenance; it allows me to check how it's doing and feel maternal ;)


This foam is a harmless byproduct of fermentation. I scrape it off after about the first week.

Floating mold is NOT a sign of anything wrong with your sauerkraut; it just means there was a bit of debris that escaped the plate. Anything under the brine will be fine.

After 3 weeks, I scoop the kraut into jars, packing it down to minimize air. I then place it in the back of my fridge, or in my cool, dark pantry, for a week or two, and then give it a try. I've stored sauerkraut like this, raw and alive but dark and cool, for many months in my pantry and fridge. While I think it lasts longer in the relative cold of the refrigerator, it seems to do fine in my pantry (which is just a dark cabinet in the always-cold garage.)


It should taste salty and sour when you give it a try. The broth is very healthy and can be added to dressings or consumed alone. Try a cup of sauerkraut with a diced avocado for a super healthy, satisfying lunch. Add it to salads, or use as a side dish with really any fare. Eating sauerkraut with cooked meals helps them break down easier.

If it seems like there really ought to be a less fussy way to make sauerkraut, that's because there is! My preferred method is linked here, in a more recent article.

For more on the benefits and history of lacto-fermented vegetables, as well as a whole world of other fermentation ideas, check out the original source of my inspiration, two books by Sandor Katz. Both probably available from your local library, but also definitely worth owning. If you buy either through my ad links below, Amazon gives me a tiny bit of cash. Thanks in advance!

Read More

Sunday, May 6, 2012

Roasted Chickpeas For Snacks & Salads

roasted chickpeas

Every time I make hummus now, I cook up some extra chickpeas to roast in the oven. Roasted chickpeas are easy to make, and they're great in salads or just as a snack. A little container of them would be a healthy addition to a child's lunchbox. My kids gobble these up, and are always on me to make more if we run out.

To begin, cook up your chickpeas however you like, or use canned if you want. I soak and sprout all my beans and peas for a day or so. This is a completely optional step. To sprout your chickpeas, soak them overnight in filtered or dechlorinated water (click the link to see how I make this for all my sprouting) then sprout for about 36-48 hours, rinsing every 12 hours, until they grow tails about half as long as the bean. With sprouted chickpeas the cooking time is shorter, and sprouting also helps with digestibility. 

sprouted chickpeas
Chickpeas after optional two-day sprouting

Once they're sprouted, I toss them in a crock pot, with water about an inch over the top of the peas. You can of course cook them on a stovetop, but I find that more labor intensive. I love the crock pot method because I can toss everything in and not think about it again for several hours. I cook them on low for probably 6 hours, but crockpots are very forgiving and have a large window of "doneness". Whatever your method, cook until the chickpeas are tender.


crock pot chickpeas garbanzo beans

When they are cool, separate the chickpeas from their liquid, as much as possible. If you are using canned chickpeas, this is where you jump in. You can use a slotted spoon or pour them through a colander. Rather than dumping it out, the cooking liquid can be used as a soup base, or added to enrich other sauces.

Heat the oven to 350, while melting some coconut oil or butter on a couple of cookie sheets. I use about two teaspoons of coconut oil on each of my small sheet pans. Just use enough to thoroughly coat the pan, with some extra to coat the peas. Feel free to use your favorite cooking oil. The first time I made these I used bacon fat, and they turned out supremely delicious.

When the oil is melted and spread over the pan, place the chickpeas on each tray. Having a small oven, I can only fit about 2 cups of chickpeas on each cookie sheet. If you have full-size cookie sheets, you will be able to cook more at a time. 

Sprinkle the chickpeas with sea salt and pepper. I use about 1/4 t salt and several grinds of pepper per tray. With a spatula, stir the chickpeas up and level them on the tray so they're evenly distributed. Feel free to use any spices or herbs that strike your fancy. They will be good no matter what you flavor them with! My family is happy with this simple version, but you could also experiment with curried chickpeas, and sesame tamari sound delicious as well.

Bake at 350 degrees, for about 30 minutes. Stir with your spatula occasionally, and a bit more frequently during the second half of baking. I also rotate my pans partway through so they get heated more evenly. Remove from the oven when they look good. Remember, they're already cooked, so this roasting is just about lightly toasting the beans to add flavor and texture.

How long they cook can depend on what you're using them for; they get harder the longer they roast. For a salad, we like them still pretty soft so they are easy to fork.


roasted chickpeas
Yum!

We purchase our organic garbanzo beans in bulk from Azure Standard, a natural foods distributor. Below are Amazon Affiliate Ads. Any purchase made through them helps support our family. Thanks in advance!
Read More