Monday, July 30, 2012

Making Fresh Mayonnaise That Keeps
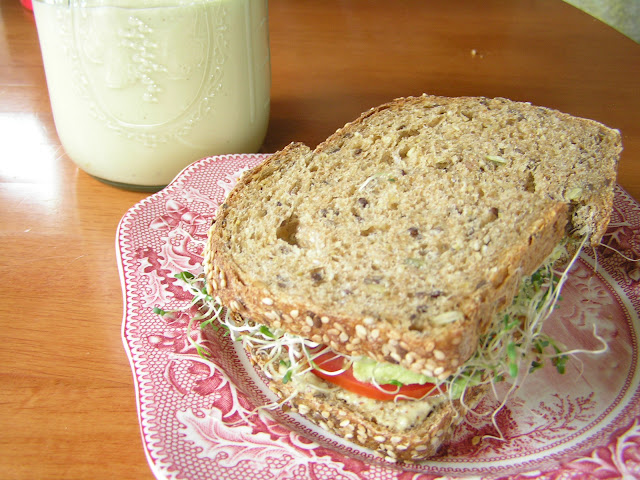


Once I realized I could make our own mayonnaise so easily, I felt pretty committed to never buying the store-bought kind again. We like doing things ourselves: We know what's in it - we never have to read food labels and wonder what they really mean - and we can make it exactly how we want. That storebought stuff was iffy, but I'm confident this raw, fresh mayonnaise is actually good for my family.

Olive oil mayonnaise has a stronger flavor than canola, soy, or safflower mayonnaise, but you get used to it pretty quickly, and even come to appreciate its flavor contribution on sandwiches. I found that using more egg and less oil in my recipes helps to neutralize the flavor so it's mild enough to work for all our mayonnaise needs. Of course we throw in garlic as well because garlic is delicious, and it's antimicrobial properties probably help fresh mayo keep longer as well. Feel free to use whatever oil you like for your homemade mayonnaise.

I'd tried making my own mayonnaise twice in the past: Once, successfully, from a Joy of Cooking recipe for aioli. It was great, but we didn't use it up soon enough and it went bad. The next time, in more recent years, my emulsification failed and, not knowing how to fix it, I dumped all those great ingredients because they were in an unusable slurry, and vowed to leave mayonnaise making to the professionals.

Well, I'm pretty much done leaving anything to the professionals. Every organic mayo we've found in stores has soy oil in it, or other iffy oils, and the only soy free mayonnaise choices are non-organic. We've been making do with store-bought for so long now because I thought it was beyond me to make a decent mayonnaise myself. Glad to be wrong!


Making It:

You can mix the ingredients with a food processor, a blender, or an immersion blender. Or, if you're way burlier than I am, use a whisk. Or a fork! Whatever you use, be prepared to stick with it for several minutes of intense mixing.

The secret to successful emulsification is to pour the oil in so painfully slowly; it should take minutes, and start with only the thinnest stream. I used to have Nik do this part because he's way more patient than I am. If it still fails to emulsify, or bind the egg and oil together, I've read that you can save it by blending in more eggs before adding the rest of the oil. I haven't had to try this, but I'm very glad to know there's a method to rescue a botched batch.

Another trick that helps to get nice, spreadable mayonnaise is to blend it for several minutes, way longer than you might think necessary, until it's nice and thick. So, blending as you go, slowly pour up to 1/4 of the oil in with the eggs. Then stop adding oil and just blend until emulsification is obviously happening and the mixture is thick. Then you can more quickly add the rest of the oil. Never rush it, especially if you are just learning how.


Making It Last:

So, making fresh mayonnaise successfully is really not that hard, but most of us are used to a mayonnaise that keeps for longer than 4 days, and the fresh stuff should really be used up fairly quickly. However, longer term freshness can be achieved through lacto-fermentation!

Lacto-fermentation is a controlled process of growing certain beneficial micro-organisms, which inhibit the growth of others, thus ensuring a longer-lasting mayonnaise. When I make fermented mayonnaise it keeps for a few weeks, while the unfermented stuff keeps only a few days. The flavor of the mayonnaise doesn't change, to my palate anyway, during fermentation.

Fermenting mayonnaise involves simply adding some ginger bug, aka lacto-fermented soda starter, or kombucha, or some raw whey from cheesemaking if you have it. If you don't have any of these ingredients and you just want to make some fresh mayonnaise to eat within 4 days, you can use vinegar in the recipe instead. This recipe makes about 3 cups of mayonnaise.


How to:

Blend 3 eggs until creamy (use the best, freshest eggs you can get)

Ever so slowly, trickle in 2 c olive oil

Blend until soft peaks form, several minutes if needed

Add 2 cloves garlic

1 t sea salt

If fermenting, add 2 tb kombucha, ginger bug, whey, or raw apple cider vinegar (follow the above links to make your own)

Blend well and place in jar. Use within 3-5 days, or proceed with fermentation:

In this case, fermentation does not take long. Cap tightly and leave at room temp, out of direct light, for about 7 hours. This will preserve it for about 3 weeks.


Ketchup, mustard, and mayonnaise, all lacto-fermented!

Below are Amazon Affiliate Ads. Any purchase made through them helps support our family. Thanks in advance!
Read More

Saturday, July 14, 2012

Grain-Free Black Bean Brownies

black bean brownies

Who would have thought these brownies, basically consisting of blended beans, cocoa, sugar, and eggs, would be so delicious? I know I never did. I'd read about them here and there, and finally decided to give them a try. They are absolutely fudgy and amazing! They have a great texture. What's more, they are simple to make.

If I'm going to bother making something, it's got to be healthy, so I haven't actually made brownies in a long time. This was a nice change! I've brought these brownies to potlucks, where everyone was impressed that they were eating beans. You won't taste the beans! I've also found that this recipe works great to make black bean chocolate cake pops, for the 4 year old in all of us ;)

black bean brownies

The candied walnuts on top are a simple addition that makes them divine. Leave them out if you don't like nuts. My kids prefer them that way, but then, they are nuts ;)

You can start with canned beans, but I just cook extra beans when I make a batch of soup. After they're tender, and before adding anything to the soup, I remove the two cups of beans for this recipe. If you're using canned, I've read that it's best to rinse them so they don't have such a strong flavor. I haven't found that the beans need to be rinsed when cooked fresh.


black bean brownie batter
The batter is so good you could make it into ice cream.
Blend together in food processor:

2 c cooked black beans, drained of all liquid.
2/3 c sucanat, or sugar of choice
1/3 c cocoa, or carob powder
2 tb coconut oil, or butter
3 eggs, or flax seed egg substitute
1 1/2 tb vanilla extract (try making your own!)
1/4 t sea salt

Pour into greased 8"x8" pan. Top with optional walnut topping, and bake at 350 until done- maybe 15 minutes. I stay near the oven so I can smell them, and when the top starts to crack, they're golden.

walnuts brownie topping

Optional Walnut Topping:

1/2 c walnuts, broken or chopped into small pieces
1 tb agave

Stir together in a bowl until nuts are coated in agave. Sprinkle over batter before baking.


black bean brownies
Enjoy!

Below are Amazon Affiliate Ads. Any purchase made through them helps support our family. Thanks in advance!
Read More

Monday, July 2, 2012

Using A Natural Salt Crystal Deodorant

Most people think they have to choose between a conventional chemical deodorant, and smelling like a hippie (no offense, hippies). There is, however, a third option: a natural deodorant that really works:

salt crystal natural deodorant

For over a decade I've been using a salt crystal after every shower. When you first start using it, it feels like a kind of superstition, like knocking on wood or crossing yourself to ward off evil. How could rubbing salt under your arms help to ward off the stink of sweat?

The magic is in the science of salt. Salt kills bacteria. It's the same reason we use salt water in our neti pots, or a saline solution to flush a wound. In the case of underarm odor, sweat itself has no smell. The stink is caused by bacteria that have proliferated and left their earthly bodies, leaving only their essence behind. Salting right after you shower halts the growth of this bacteria before it can begin. 

natural deodorants

Which brings me to the limitations of this deodorant: It will do nothing to mask already stinky pits. If you try using it once you already stink, you will come to the conclusion that it doesn't work. It cannot cover up any smell, it is a preventative! Nik and I have other natural deodorant sticks that have a nice smell, which we use on our off days... when maybe we really should have gotten a shower in but it just didn't happen, or once in a while I'll forget to use the salt crystal after my shower, and then use the scented one as a last resort. These ones don't work as well to prevent body odor, but they do hide it with their own scents. But really, I rarely use this type because the salt crystal works that well.

salt crystal deodorant

Another near magical property of the salt crystal deodorant is that it never gets used up. I'm pretty sure one tube, or whatever form you buy it in, would literally last a lifetime-- as long as you never dropped it. They shatter like glass when they get dropped. I have only ever bought two, which have served me well over the past 15 years. The more recent purchase remains in one piece, like new. The top photo in this article is the one we've been using for 8 years straight. Two shards are all that remain of the original crystal I had... a reminder to be more careful. They do get slippery when wet! The shards are great, however, for travel-sized deodorant. I keep one in my bag for showering at the yoga studio, and we have one in our overnight kit.

I am not advertising this thing, and in fact if anything ever happened to my current salt crystal, I would look into how to make my own. Is that possible? I haven't checked... They only cost a few dollars, and they last for decades, so it's probably a worthy investment to buy a packaged one. I just like to DIY everything I can. ;) 

Below are Amazon Affiliate Ads. Any purchase made through them helps support our family. Thanks in advance!
Read More