Monday, September 17, 2012

Easy Artsy Lightswitch Plate Covers

lightswitch plate cover

I have no tolerance for dingy white walls- they MUST be painted!- and I feel the same way about ubiquitous off-white plastic lightswitch plate & outlet covers. Things that we have to look at all the time should be beautiful. This simple process will transform plain covers into, well, anything you want them to be.

lightswitch and outlet covers

I've always enjoyed cutting and pasting magazine pictures. I doubt I've ever read a National Geographic without tearing out a few choice, gorgeous photos to use in some later art project. You don't have to use magazine pages for this, but they happen to be a nice thickness that is easy to work with. Thicker paper is a bit harder to fold around the openings, but it will still work. In the above picture, I used thicker scrapbooking paper for the outlet cover on the right. Origami paper would probably be perfect, and some of it is so beautiful. If you have some fabric scraps that you like, that would work as well as long as it's not too thick.

clear acrylic paint

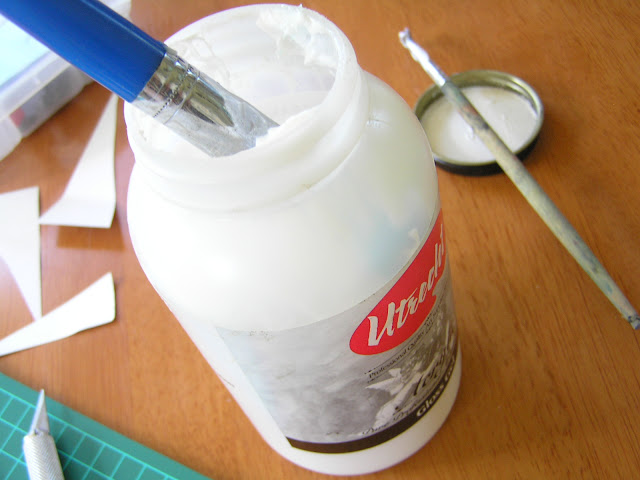
The only materials I use are an old 1/2" paintbrush and a tub of clear acrylic gloss, an exacto knife and a cutting pad. If you don't have a cutting pad, you can use a flattened cereal box or some cardboard under the knife. Or, just use scissors.


outlet covers

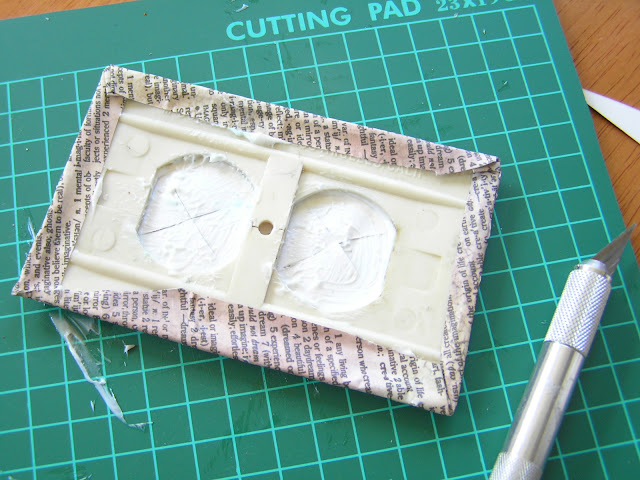
First, lay the plate you want to cover over your picture. Cut the paper around the edges of the plate, leaving enough extra paper to fold around the back of the plate. Paint the entire underside of the paper with the acrylic gloss, and center the plate over it. Fold the edges up, applying extra gloss if needed to get all the corners to lay flat. 

outlet covers

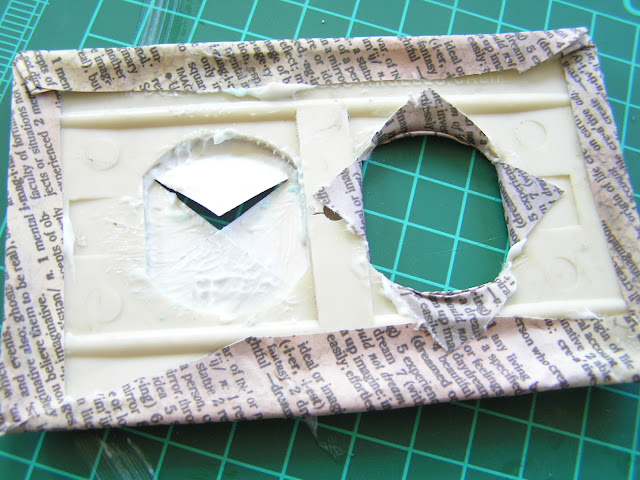
Then, make an "X" cut in the openings of the plate. Gently fold these flaps back and secure them to the back of the plate. The paper will be a bit soft and stretchy from the acrylic on it, but work gently with it so it doesn't tear. Make sure to poke a hole in it wherever the screw will need to go in.


outlet covers

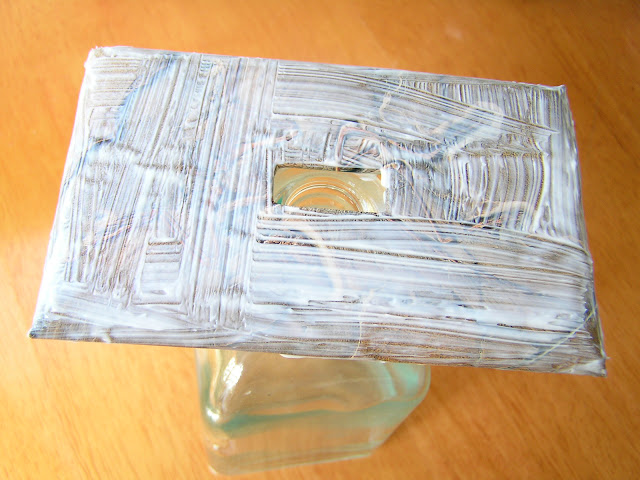
Flip it over; the hard part is done. Now, just hold it carefully and paint a nice solid layer of gloss over the whole front side. This will protect the picture and make it shiny. Below is what they look like when they're wet- the gloss goes on white but will dry clear, eventually revealing your picture in all its glory:


lightswitch plate cover

While they dry, I balance them on top of a vase or bottle, so they don't become glued to the work surface. They require a few hours to dry; overnight is probably a good idea so they're not tacky at all when you install them.

Below are some examples: 

lightswitch plate cover


lightswitch plate cover


lightswitch plate cover


lightswitch plate cover


lightswitch plate cover


lightswitch plate cover

Have fun, and good luck! I'd love to see what you come up with :)

Below are Amazon Affiliate Ads. Any purchase made through them helps support our family. Thanks in advance!
Read More

Saturday, September 1, 2012

Hang Dry Laundry Year Round- Even In Seattle

how to dry laundry

Dryers use a lot of energy to run, and reduce the life of your clothes. As a teenager I realized that all the lint that the dryer collected was evidence of my clothes gradually falling apart, and I started using a laundry rack to hang dry anything I really cared about. Generic socks, t-shirts, and towels still went in the dryer, but if I wanted something to last a long time I would hang it up instead.

This continued for years, until we bought our house and could set up a larger outdoor drying area, with space to dry a whole load of laundry on two fold-up racks:


how to hang dry laundry
The bungee cord keeps a wobbly rack from tipping over.

While dryers do suck the life out of your laundry, they also fluff it up nicely, leaving items softer than they might be when they hang dry. I find this is really only a problem with towels, and occasionally with jeans and socks. Most everything else still ends up being pretty soft after haning dry. If the stiffness bothers you, you can always toss a few things in the dryer for about 3 minutes, on an "air" cycle, just to fluff them up. For me, I've come to accept of bit of stiffness and no longer expect my towels to be "downy soft". Usually after one use, or right after I put the stiff jeans on, they soften up on their own anyway.

While we don't live in Seattle proper, we "benefit" from their notorious weather patterns. It's wet. The typical clothesline setup would only work for about 3 months a year here, so we have to hang laundry someplace where it's protected from the weather. For a while, our only covered outdoor area was the front porch, and in the wet months I dried our laundry there. Not the most inviting sight for a front porch, but I was committed to this energy-saving method.

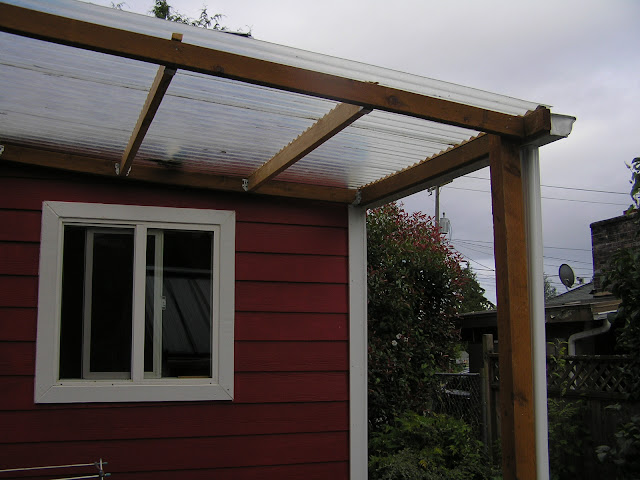
Seeking a solution that was somewhat less visible, Nik built a fiberglass extension to our roof on the back of the house. The light comes through, but not the rain. Now we have a dry area, on the sunny southwest corner of our house, where a whole load of laundry can hang in relative privacy. 

How to hang dry laundry outside

In winter, it can admittedly take a couple days for heavier things to dry, but in summer they will often dry faster than they would in a dryer. When the wind blows the rain sideways, they can still get wet or get blown off the racks, but all in all it's very effective and easy. 


covered outdoor area

The roof extension also provides handy dry storage for bikes & trikes, and other outdoor kid toys as well as Nik's motorcycle projects. It's been very handy!

Update: I have upgraded from these flimsy wooden folding racks, to one that I absolutely love. It is so clean and sturdy, can hold an entire large load of laundry, and folds up easily when not in use. I've been using it for over a year now, and am so happy with it. It feels like it will last forever. I'm linking the ad for it below; if you decide to purchase it through my ad link, I will earn a little income. Thanks in advance!


Read More