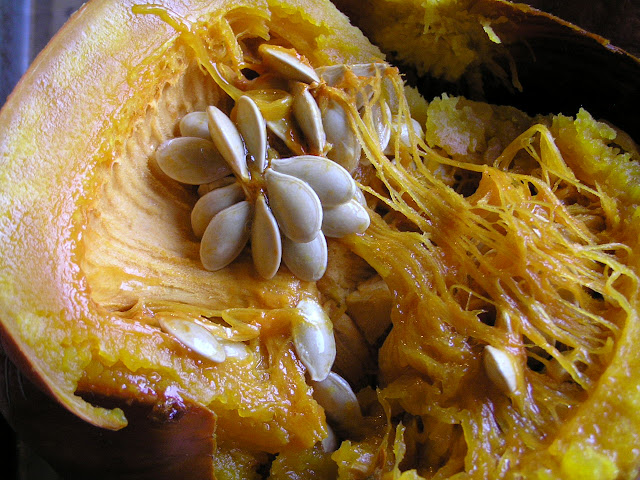
Literally, all you have to do is take your squash and bake it in the oven until it's soft. I preheat the oven to about 375. I find it essential to place a baking sheet on a lower rack, below the squash, to catch the drips. Rather than timing them, I determine their done-ness first by noticing them leaking liquid onto the baking sheet, and second by poking them with a knife. It should go in very easily. It might take 50 minutes to over an hour, depending on the size of the squash you are roasting.
 |
| Pumpkins will start leaking fluids when they are nearly done. |
Once they're soft, remove them from the oven. I pull out the baking sheet first, and place the squash on it to cool. If you cut them in half they will cool faster. They will slice like butter.
Once they cool enough that you can handle them easily, scoop out the seeds and gunk from the center. If you have any kind of farm animals, they will love this stuff. Even my cat eats it. Of course, you can roast the seeds for people as well.
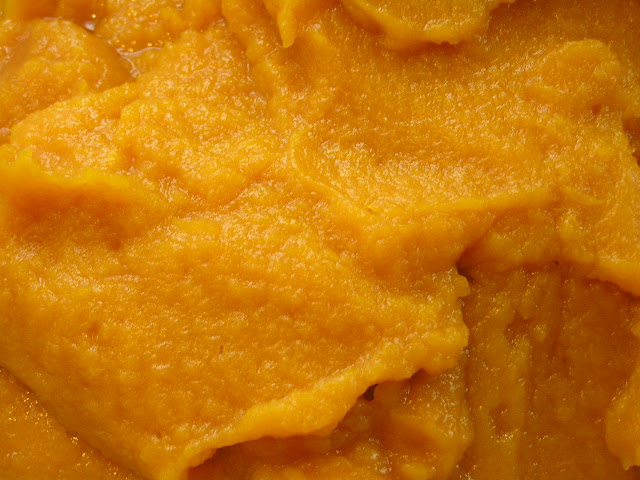
Next, separate the flesh from the skin. This is easier with the thicker skinned pumpkins, a bit more of a hassle with butternut. Place all the flesh in a food processor, and blend until it looks like this:
Use this puree to make whatever you like, from soups to pies, breads to ravioli. It's super easy and you'll never need the canned stuff again! I like to roast more than I need and freeze the excess. You could also can it after pureeing.
This roasting method works great for making delicious spaghetti squash as well!
Below are Amazon Affiliate Ads. Any purchase made through them helps support our family. Thanks in advance!
Share the article to support the site!
Roasting Whole Squash For Fresh DIY Purée
4/
5
Oleh
Mellow


15 comments
Write commentsI used to do this and then I moved to doing it in the microwave but didnt really like that, so this year I decided to give my pressure cooker a try. I did cut them open first and remove the seeds (I save many for next years plantings) and then put them in the pressure cooker for about 12 minutes. Fastest & best tasting way in my opinion.
ReplyI've never used a pressure cooker! That's a great idea to save seeds for planting Kim!
ReplyGreat idea :) I'm a clutz when I cut up squash for baking, so this is very helpful! I would love to have you share this on The HomeAcre Hop!
Replyhttp://www.theselfsufficienthomeacre.com/2013/01/the-homeacre-hop-3.html
I know! It always seem so dangerous to me. I was so happy to discover that there is a better way!
ReplyBrilliant to not have to cut them cause i always felt that way too!!! Like a finger could come off. Thank you so much!!! And I always make the seeds into a great roasted snack...
ReplyI also always keep some extra puree in the freezer for my dogs...it is the best thing ever for ANY digestive problems...and they eat it right up...so it is a staple in my house. Good for dog weight loss too, as it fills them up for little calories, is very healthy and they don't notice the reduced kibble so much...per my vet.
Thanks Kassandra! Animals just love pumpkin, don't they? When I told a friend that my cat gobbles up pumpkin seeds, she said they are great for animals and have a natural anti-parasitic quality! Do your dogs eat the seeds as well? I think of cats as being strict carnivores, so I am always surprised at what our cat will choose to eat- he always likes to check out the bowl of scraps before we bring it to the chickens.
ReplyI always slice my squash to roast, but this would definitely be easier! We cook blue hubbard squash here, and you can't even cut that with a knife...usually we throw it down on a little concrete pad next to the door :-) Would love to have you link this up at what i am eating http://www.townsend-house.com/2013/01/what-i-am-eating-11.html
ReplyHa ha, I like the image of just smashing it down on the walkway ;) I will check out your link-up, thanks!
ReplyGreat directions!
ReplyThanks for linking up at our Gluten Free Fridays party! I have tweeted and pinned your entry to our Gluten Free Fridays board on Pinterest! :)
On the Gluten Free Fridays tab we have new badges for you to display on your blog. There are a few different choices for you. There are varying sizes as well. If you've had a featured recipe in the past, feel free to grab one of those badges as well! They are free for the taking; use as you wish! Thanks for supporting our GF community and spreading the word!
Thanks for linking back to the Gluten Free Fridays post!
See you at the link up this week!
Cindy from vegetarianmamma.com
Hi, a new follower here found you from the Chicken Chick blog hop. Great tutorial on kambocha, my first batch got moldy but I'm ready to try again. Pat from www.dogwoodlanerambles.blogspot.com
ReplyPatricia, do you have any idea why your kombucha molded? I've never seen it happen so I'm just curious. Thanks! Good luck next time!
ReplyThanks for sharing this post on Wildcrafting Wednesday!!! I am still working on my Ginger Bug from your recipe, it is day 4 but not too bubbly yet. I will be patient.
ReplyGreat idea! Thank you for sharing this at the HomeAcre Hop! Come back this morning:
Replyhttp://blackfoxhomestead.com/uncategorized/the-homeacre-hop-25/
Your recipe is wonderful, and thank you so much for sharing it with Full Plate Thursday. Hope you are staying cool on this hot summers day, enjoy your weekend!
ReplyMiz Helen
Brilliant! I am looking forward to grabbing some pie pumpkins at Whole Foods for this over the weekend.
Reply