I have no tolerance for dingy white walls- they MUST be painted!- and I feel the same way about ubiquitous off-white plastic lightswitch plate & outlet covers. Things that we have to look at all the time should be beautiful. This simple process will transform plain covers into, well, anything you want them to be.
I've always enjoyed cutting and pasting magazine pictures. I doubt I've ever read a National Geographic without tearing out a few choice, gorgeous photos to use in some later art project. You don't have to use magazine pages for this, but they happen to be a nice thickness that is easy to work with. Thicker paper is a bit harder to fold around the openings, but it will still work. In the above picture, I used thicker scrapbooking paper for the outlet cover on the right. Origami paper would probably be perfect, and some of it is so beautiful. If you have some fabric scraps that you like, that would work as well as long as it's not too thick.
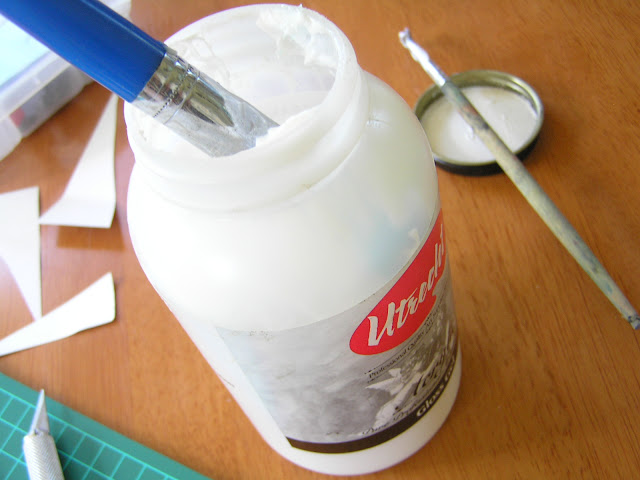
The only materials I use are an old 1/2" paintbrush and a tub of clear acrylic gloss, an exacto knife and a cutting pad. If you don't have a cutting pad, you can use a flattened cereal box or some cardboard under the knife. Or, just use scissors.
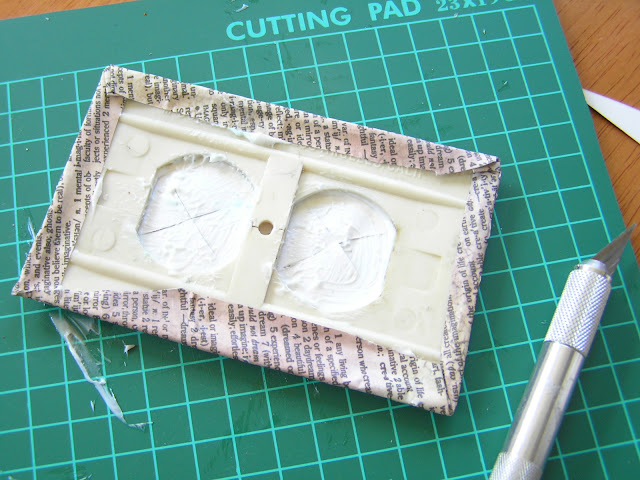
First, lay the plate you want to cover over your picture. Cut the paper around the edges of the plate, leaving enough extra paper to fold around the back of the plate. Paint the entire underside of the paper with the acrylic gloss, and center the plate over it. Fold the edges up, applying extra gloss if needed to get all the corners to lay flat.
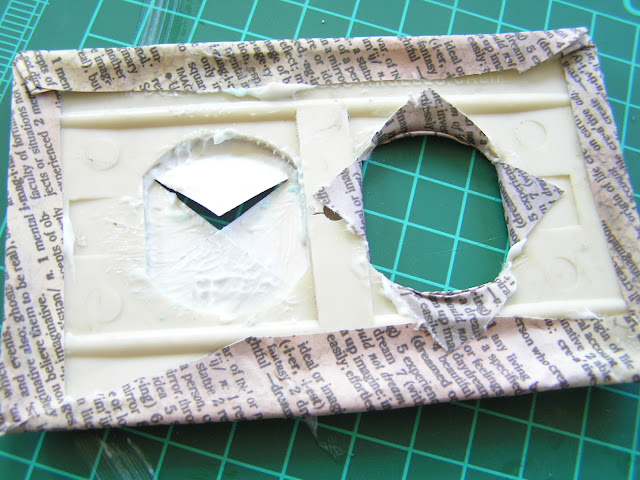
Then, make an "X" cut in the openings of the plate. Gently fold these flaps back and secure them to the back of the plate. The paper will be a bit soft and stretchy from the acrylic on it, but work gently with it so it doesn't tear. Make sure to poke a hole in it wherever the screw will need to go in.
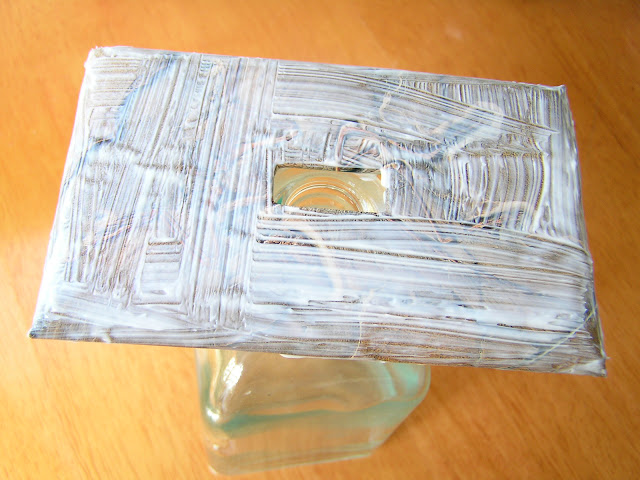
Flip it over; the hard part is done. Now, just hold it carefully and paint a nice solid layer of gloss over the whole front side. This will protect the picture and make it shiny. Below is what they look like when they're wet- the gloss goes on white but will dry clear, eventually revealing your picture in all its glory:
While they dry, I balance them on top of a vase or bottle, so they don't become glued to the work surface. They require a few hours to dry; overnight is probably a good idea so they're not tacky at all when you install them.
Below are some examples:
Have fun, and good luck! I'd love to see what you come up with :)
Below are Amazon Affiliate Ads. Any purchase made through them helps support our family. Thanks in advance!
Share the article to support the site!
Easy Artsy Lightswitch Plate Covers
4/
5
Oleh
Mellow


31 comments
Write commentsWhat fun! I suppose you could also preserve some children's artwork (a small part of it) in this way. I love the creativity!
Replyi love it! these are so cool! :D
Reply<3, Mimi
http://whatmimiwrites.blogspot.com/
Spirit Ink Tattoos Giveaway
Too Much Soul Giveaway
Rebecca, that is a great idea! We still have some left to try that with.
ReplyAbsolutely pinning. We have one that has a little boy and girl kissing in our bedroom....not our kind of cute. Have been meaning to change it for a while!
ReplyYou know, it's stuff like this that I rarely make time to do, but it's stuff like this that my kids LOVE and would probably brag to all their friends about. This is a great idea. I think we'll do this in their bedrooms STAT. Thank you for the idea!
Reply-Brittney
http://smartgirlstyle.blogspot.com (my new home-decor blog; come on by if you'd like! Just leave your expectations at the door before you come in... :) )
It would be a great project for kids. I selfishly did them myself... but maybe I'll give the remaining switchplates to the kids to do... maybe. I'm kind of particular about what I want on the wall! The kids get the fridge though ;)
ReplyWOW...who knew you could do switchplates SO many ways. VERy creative.
ReplyLaurie @ Pride in Photos
Thanks Laurie!
ReplyVery creative...I don't like plain switchplates either.
ReplyLooks familiar!
ReplyHere's my post: http://pocketpause.com/tutorial-tuesday-diy-light-switch-covers/
I wish i'd had my medium unpacked, though as it would work much better than the glue i used.
What a fun way to decorate for fall!
ReplyWhat a great idea. My kids would love this too!
ReplyNice!
ReplyLove this idea! I suppose you might be able to use personal photos if printed on the proper paper.
ReplyThanks so much for sharing at Rural Thursdays this week. xo
Yes! If they were printed on thinner paper they would be great.
ReplyIn from the Homestead Barn Hop and I'm so glad I found your blog. I never thought about light switches... I've got to do this PLUS I'm going to pin your site. My blog http://homesteadingwithkelin.blogspot.com/
ReplyThese are so cute. Great tutorial. Thank you so much for sharing with Wednesdays Adorned From Above Link Party last week. This weeks Link Party is opened at
Replyhttp://www.adornedfromabove.com/2012/09/how-to-make-natural-tinted-lip-balm-and.html
from Wednesday until Sunday.
Hope to see you there.
Debi Bolocofsky
Adorned From Above
www.adornedfromabove.com
Perfect! I'll be moving this year after my wedding and currently the whole inside is cheap white! This will allow me to showcase my artistic side while adding color to my entire home! The ideas!
ReplyI just added your blog to my daily read file.
Thanks, that's so great!
ReplyHi from Quebec!
ReplyWe're a family of homeschoolers, with two girls aged 8 and 6, and we just came across your amazing blog this morning. We spent part of the morning doing the light-switch project, and the girls now have very cool new light-switches that they're proud of. I also got some vanilla beans, and we're planning to make some vanilla extract using your earlier blog post. Thanks for your great ideas! We'll be using some in our weekly science group class.
Speaking of which, I was wondering if you have any suggestions for science project idea sites. We've already done oublek, volcanoes, dissolved things in Coke and orange juice, but we're looking for more unusual and interesting projects, like the kinds on your site. Do you have any suggestions?
Thank you!
Alex
Thank you! Gosh, I don't know about science projects. Are you doing some fermentations with the group? This might be inappropriate for kids (but parents could always enjoy the results) but you could try making the honey wine, or another kind of mead or wine, and use a hydrometer to measure the percent alcohol over time. It's something I've been curious to try but haven't gotten a hydrometer yet. The kids might find it interesting even if they don't get to drink it. You could even let some go to vinegar, just to show how the molecules change from sugars to alcohols to acids.
ReplyDear Mellow
ReplyI'm really glad to have found your blog. I appreciate the care you put into your recipes and explanations (not to mention the humanness that comes forth in your replies). Every post (or every post I've read) has me wishing I could try it! And you live in WA! You are seriously living my dream life :) Can I pack up my 2 boys and camp out with the chickens?? Haha. Thanks for the awesome info/ blog.
A new fan!
Oh C.J. thank you! Where do you guys live?
ReplyWe live in Los Angeles but it's a goal (or wish) to move up to Seattle some day. Somewhere a little more wet and green!
ReplyI'm going to have to try this. Very cool!
ReplyHow fun and resourceful! Very cool idea, thanks for sharing on Hearth & Soul Hop. :)
ReplyWhat a great idea! I love them. A while back I used polymer clay to cover some of my plate covers? But this would be way easier. Thank you for sharing.
ReplyI love your blog. So much great information, and great project. I have signed up to receive your newsletter, so I won't miss any of your wonderful post. Thanks
Linda
I am seriously un-crafty, but even I could do this! Love the idea...can't wait to try it.
ReplyPopping in from Oh, Mrs. Tucker!
Great idea for covering up those plain white covers!
ReplyThanks for linking up to The Creative HomeAcre Blog Hop!
Neat ideas! Thanks for sharing on Wildcrafting Wednesday! Hope to see you again today at:
Replyhttp://www.theselfsufficienthomeacre.com/2013/06/wildcrafting-wednesday-24.html
These are so cool! What a great craft for kids and adults alike.
ReplyThanks for sharing on Natural Living Monday!