Saturday, January 28, 2012

How To Make Sprouted Sunflower Seed Dip

This is a staple food around here. My son loves to scoop tortilla chips in it, and I often use it to fill nori rolls, in stuffed peppers, or just as a dip for veggies. This is what, for me, turns a bunch of raw vegetables into a meal. It also makes a great sandwich spread. It takes about 4 to 6 hours to soak the sunflower seeds, which can be rinsed and used right away, or sprouted for a day or two. The soaking helps make them more digestible, and sprouting contributes to their nutritional profile. The recipe is quick to make once your sunflower seeds are ready.


raw sprouted sunflower seed dip

1 1/2 c raw sunflower seeds, soaked, rinsed, and sprouted if desired
1/2 c fresh lemon juice
2 tb tamari or liquid aminos
2 small cloves garlic, thinly sliced, minced, or pressed
1/4 t sea salt


raw sprouted sunflower seed dip

Process all ingredients together until fairly smooth. Scrape down the sides of the food processor a couple of times to incorporate all the seeds and garlic.
It will keep for about 2 weeks in the fridge.
Use as dip, sandwich spread, stuffed peppers, or in nori rolls. It's versatile, filling, easy to make, and delicious. Definitely one of my favorite recipes!


nori roll with raw sprouted sunflower seed dip
With sprouted lentils in a nori sheet

Below are Amazon Affiliate Ads. Any purchase made through them helps support our family. Thanks in advance!
Read More

Wednesday, January 25, 2012

How To Make Everlasting Vanilla Extract

homemade vanilla extract
Two ingredients, plus time, in a bottle = lovely, aromatic, everlasting vanilla
Whole vanilla beans are something I've really never used on their own, but I LOVE vanilla extract for all kinds of recipes, and love being able to make my own extract so easily. Plus, this is one less reason to ever go to the store. OK, besides the liqueur store...

All you need is some hard alcohol (I use 80 proof brandy, rum, or vodka), a vanilla bean, and a clean bottle. To be fair, you also need patience. This is no instant gratification recipe. While you can use the vanilla extract after as little as six weeks, at that point it will smell more like alcohol than vanilla. Give it a full three months for the best flavor. If you want to speed up the time it takes before you can use your vanilla extract, try using a greater proportion of vanilla beans in the bottle. This will have it tasting of vanilla sooner, though it will cost more.


alcohol for homemade vanilla extract
Really, anything works as long as it's hard
What makes it everlasting? When the bottle runs low, you just top the vanilla off with more alcohol and let it set for a couple months again. You can do this many times before the vanilla bean loses it's magic. While vanilla beans aren't cheap, one bean makes a lot of extract when used like this. I buy 1 oz of organic vanilla beans (about 9 beans) for $6 from Azure Standard, but you can also find them at health food stores in bulk.


homemade vanilla extract
This is the first bottle I made, which is a bit too small for how often I use vanilla. To keep me in vanilla extract, I have two 8 ounce bottles going in rotation.
Instructions:

Cut the vanilla bean into short pieces so it fits into the bottom of the bottle. If you leave the pieces long, you will have to refill it too often to be very useful (it's best if the alcohol always covers the vanilla bean).
Place one cut bean in each 4 to 8 oz bottle (you can use 1/2 bean if using very small bottles).

Fill the bottle with hard alcohol of your choice. I've used vodka, brandy, and both dark and light rums. To me, it really doesn't make a difference which type of alcohol I use; use whatever you have! Not tequila though because that would be disgusting.

Keep at room temperature, wait 3 months, then use as you would any store-bought vanilla extract. For best results, give the bottle a gentle shake every week or so, to fully distribute the vanilla flavor into the alcohol.

Refill when alcohol gets lower than the top of the vanilla bean (the alcohol preserves the bean, so it should always be submerged).

Because of the wait time after refilling the bottle, I keep two 8 oz bottles in rotation these days, so I never run out, or have to use vanilla that tastes like brandy. Every time I use some vanilla, I gently shake both bottles.

How long will it keep? Alcohol will preserve the vanilla indefinitely, as long as the beans are fully submerged and it's stored in a dark cabinet or in a dark glass bottle. When it gets low on flavor, cut up a new bean and toss it in. 

Below I'm linking to Amazon ads, to help support our family. Thanks in advance!
Read More

Sunday, January 22, 2012

Recipe For Raw Apple Cereal

raw apple muesli

I make this cereal the night before we want to eat it, so the oats have time to soften and the flavors can blend. It's really easy to make, and so fresh, light, and delicious! If making this for one person, the recipe is easily cut in half, though leftovers will keep fine for a couple of days in the fridge.

Ingredients:
2 apples, cubed
2 t lemon juice
1/2 c thick cut oats
1/2 c raisins, currants, goji berries, or a combination
2 t honey or agave (optional)
1/4 t cinnamon
1/8 t sea salt


apples for cereal
Processing the apples with lemon juice keep them from oxidizing
To begin, blend apples with lemon juice in a food processor, until fairly small. Some larger chunks are fine, but stop before it's apple sauce or it won't have much texture.
Stir apples together with everything else. Refrigerate 8 hours or overnight to soften the oats and mingle the flavors.


raw apple cereal

Serve alone, or try it with sliced bananas, milk, kefir, or yogurt.
I don't think this recipe is really picky about which apples you use. I generally buy whatever interesting variety is cheapest: gala, cameo, pink lady, honeycrisp, or braeburn. The lemon keeps the apples from turning brown during the long soaking.

This is really a great, healthy breakfast or snack. My son says it's better than boxed cereal, which we've stopped getting in favor of more cost effective and nutritious choices.

Below I'm linking to some related Amazon ads; any purchases through them helps support my family. Thanks in advance!
Read More

Thursday, January 19, 2012

How To Make Raw Kale Chips

There's something so lovely about watching my kids scarf down a whole bunch of kale. When it's in the form of raw, dehydrated kale chips, they do this with gusto.


Crispy and full of flavor, these make such a great snack!
I have seen the prices that these things sell for if you were to buy them, it's crazy. It probably works out to about three chips for a dollar. You can make a whole batch yourself for a little more than the price of a bunch of kale.

Making these is a little bit of a production, but it's worth every minute. Really it's only 3 steps: 

  • Prep the greens 
  • Blend the sauce 
  • Mix well and load into dehydrator 

I love a recipe that accommodates improvisation well, and this one really does. If a recipe is too picky, I have a hard time because I really like to use what I have on hand. I have made dozens of batches of these chips, with all varieties of sauce, and they always turn out so good.


The Kale:

Using a whole bunch of clean, dry kale, remove stems (which are too tough and fibrous for dehydrating nicely) and cut or tear into chip size pieces. My kids enjoy the long skinny pieces; make them whatever shape works for you. I like to use dinosaur kale, also called Lacinato, but red kale and curly kale work fine. In my experience, the red Russian kale is too tender for dehydrating, it becomes very brittle. I have tried other greens, such as collards, and they just don't hold up in the dehydrator as well. 

Place prepped kale in a large bowl.


The Sauce:

1 cubed sweet potato
1/4 c agave or honey (optional)
2 Tb raw coconut oil
1/4 c apple cider vinegar
2 t sea salt
3 cloves garlic
1/2-1 onion
1/4 c nutritional yeast
1/2 c water (more if needed to blend to creamy sauce)

A high speed blender is perfect for making this creamy sauce, but a having some chunks in there is totally fine, they will become very small in the dehydrator, so a standard blender will work as well. Blend all ingredients until creamy; pour over kale.


kale chips before dehydrating

Coat & Dehydrate:

With a clean hand, mix the kale with the sauce until both sides of every piece are fairly well coated, then lay them in a single layer on mesh dehydrator trays. I dehydrate them overnight at 105°. They can be done in as little as six hours. They are done when completely crisp, and will keep in a sealed container for a few weeks as long as they stay dry. If they become a bit soft or stale, they can be crisped up again with a short stint back in the dehydrator.


kids eating kale chips
My kids enjoying kale chips fresh off the dehydrator tray!

Interested in upgrading to a high speed blender? I don't go a day without using my Blendtec, often twice. Once you try a truly powerful blender, you will never go back! I'm posting the ad link below to my beloved Blendtec, as well as the other leading brand, Vitamix, for comparison. Please check it out if you're interested. Every purchase through my ad link helps provide us with a little bit of income.
Read More

Wednesday, January 18, 2012

You Can Ferment Anything!


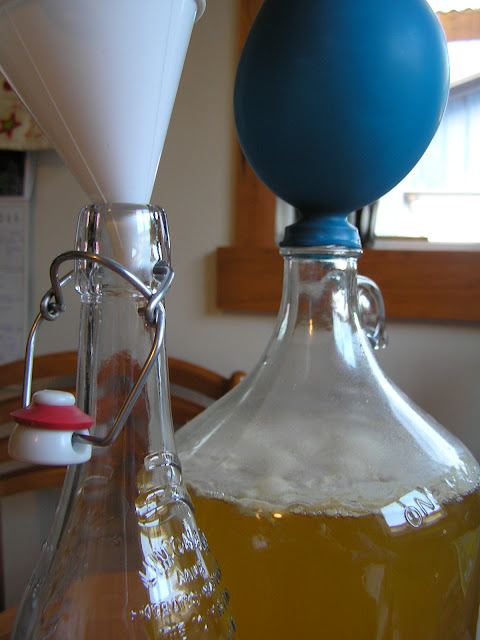
lacto-fermented grape soda
Making grape soda... or possibly wine
Our latest fermentation experiment is grape juice. We're using natural fermentation to turn it into a soda... or possibly a sparkling wine, depending on how it turns out! Other things we've got fermenting in the kitchen right now are sourdough starter, sauerkraut, salsa, honey wine, kombucha, beet kvass, and two types of kefir. It's so easy! Follow the links to see my tutorials on each of these.

Fermentation is a natural preservation method. The idea is to control the growth of bacteria with certain cultures, and sometimes the addition of salt, to promote the good stuff and create an inhospitable environment for the bad stuff. In a dark cabinet of my cool pantry (OK, just a corner of the garage) several jars of my homemade sauerkraut lasted for several months without any problems; no refrigeration needed! Kombucha will keep, tightly sealed in a cool dark place, for months. And fresh salsa, which normally would need to be used within a few days, will last for a month or two after 3 days of fermentation! Unlike canning or freezing, fermentation preserves food while enhancing its nutritional profile.

beet kvass
Refreshing, healing Beet Kvass
It's astonishing how many of our modern day foods were traditionally naturally fermented. There's the obvious ones, like sauerkraut, pickles, and beer, which are rarely actually fermented anymore. Large scale production requires a kind of uniformity that can't be so easily achieved through natural fermentation. Plus it's just quicker and cheaper to use large amounts of vinegar and/or sugar to mimic natural fermentation. Ketchup was also traditionally a fermented food. Think how much healthier we would be if all these ubiquitous products were still prepared in a nutritionally beneficial way! 

Sometimes fermentation changes the flavor or consistency of foods, or creates carbonation or alcohol, and generally fermentation makes things more digestible and nutritionally accessible. It's amazing to watch a jar of milk thicken overnight into kefir. How does it do that? Twice a day I stir my gallon of soda, and suddenly it bubbles ferociously, letting me know it's alive and ready for bottling. It's so exciting, like some kind of hybrid between a garden and a laboratory.

Honey wine ready for bottling
Honey Wine ready for bottling
During my early attempts I made some batches of foods that had to be tossed. The pickled ginger I was so excited about, and spent two hours peeling two pounds of organic ginger for, ended up tasting like rotten cheese, and my second attempt at making sauerkraut just went completely off, for some reason. The pickled grape leaves I tried making just seemed moldy. It was almost enough to make me give up on the process, but fortunately I had enough successes along the way to keep up my enthusiasm; my curiosity and quest for nutritious recipes also helped me try, try again... These days I have several recipes I know by heart, and am always trying new fermentations as well. There's a whole world out there of things to ferment!

lacto-fermented honey wine, kombucha, and rootbeer
From left: Honey Wine, Kombucha, Rootbeer
For a whole world of fermentation ideas, check out the original source of my inspiration, two books by Sandor Katz. Both probably available from your local library, but also definitely worth owning. If you buy either through my ad links below, Amazon gives me a tiny bit of cash. Thanks in advance!
Read More

Sunday, January 15, 2012

Grind Your Own Flours From Whole Grains

hand grinding flour
Odin, at age 3, grinding the flour for his own cookies
With this simple hand mill, we grind our own flour. It gives you a bit of exercise, some great tasting flour, and saves a load of money.  We buy whole grains in bulk: Organic wheat costs about 20 cents a pound, when you buy it in 40 lb sacks (edit: wheat prices have gone up considerably in the years since I first published this article, but I'm sure the savings for grinding your own is still considerable). I don't even know what organic whole wheat flour goes for, but I know it's a lot more than that, and it's not even fresh.

Fresh ground flour is better for more than just flavor; it also has a higher protein count if used within 24 hours of grinding, and the oils in grains are notorious for going rancid after being ground up as well. Many people keep their whole grain flour in the fridge to reduce rancidity, but very few grocery stores do that, leaving you with little choice but to buy rancid flour unless your are grinding your own.

Buying whole grains gives you more control over the source of your food, and keeps those grains from ever needing to be processed by a factory. You could, for example, buy grains directly from a local farmer and skip the grocery store middle man altogether! Read here about how we stopped going to the grocery store. We order our whole grains from Azure Standard, an Oregon based company that distributes natural foods to grocery stores, and to any groups that meet the minimum purchase of $550. 

With our home mills we can make our own flours from millet, spelt, rye, oats, rice, corn, and teff grains, as well as many types of wheat.

There are tons of electric flour mills out there as well, which are much easier and faster than our manual one. We generally like hand-powered things though; our mill is relatively quiet, simple, will last forever, and will work when there's no electricity. 

I did recently discover, however, that my high-speed blender can make flour so fast! It's turned me back on to baking. I have always loved baking, but don't necessarily feel like sitting down at the grinder for 30 minutes before I can make anything. The blender is great, quick and easy, although it does not grind the flour so fine or give you as much control over the grind. Our hand crank mill is Back to Basics brand, and our blender is a Blendtec. While I have made oat flour in a standard blender, I think a high-powered blender is required if you want to make flour from anything harder than oats.


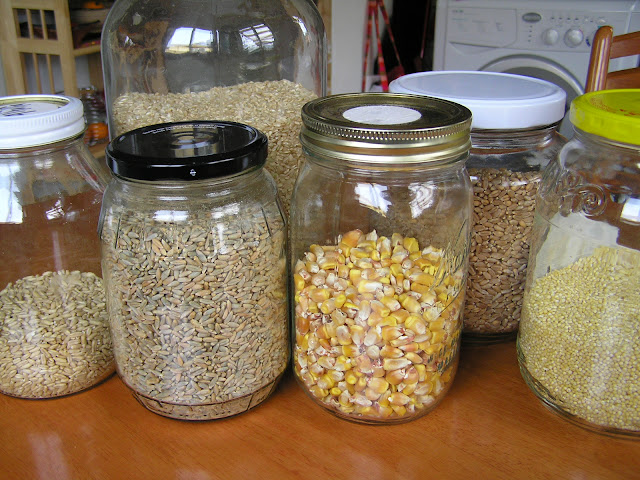
Whole grains stored in jars
These can all be made into delicious and healthy flour combinations. From right: Oats, rye, rice, corn, wheat, millet


Some things you could make with your fresh ground flour include: your own sourdough starter; a delicious soaked grains breakfast cake; or, if you have a cat, you can even make your own natural, non-toxic kitty litter.

Below is an ad link for the high speed, super powerful blender that I use to grind my flours, as well as a link to the other leading brand, Vitamix, for comparison. I love it and I bet you will too. Every purchase through my ad link provides a little income for our family. Thanks in advance!

Read More

Wednesday, January 11, 2012

Sprouted Grains for Chickens

In order to avoid buying conventional chicken feeds, I've been simply buying organic whole grains ("feed quality", which is cheaper) from our natural foods distributor, Azure Standard. They are the same grains as what they sell for people, only these haven't been cleaned of bugs & dust so they're a little too funky for human consumption. They may even be the grains that have been swept off the floor of the grainery ;)


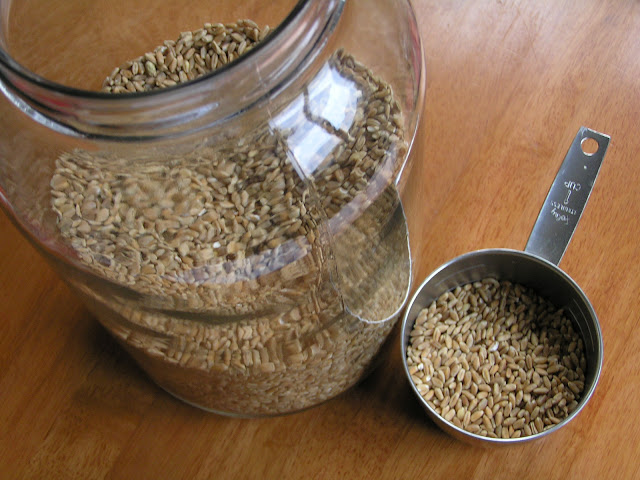
whole wheat, before sprouting
Chicken Wheat, before sprouting
Chickens will just get fat and malnourished on a diet high in grains (sound like any other species?) so what I do is sprout the grains for a few days. The sprouting process makes the wheat, or whatever grain you're using, become essentially more vegetable than grain. Each grain is a seed, which starts to grow a leaf and roots. I let the sprouts green up on a windowsill, and then the chickens gobble them up. Our eggs benefit nutritionally from the bit of my time spent rinsing sprouts every morning.


sprouted whole wheat for chickens
Ready for the chickens to eat
It's definitely more work than just tossing the hens store bought feed, but I think it's healthier, and I just feel better about doing things myself, rather than wondering what the heck they put in the feed. I have read about kids getting arsenic poisoning after eating the eggs from their own hens, who were given feed that was insanely high in arsenic. Why would anyone ever put arsenic in chicken feed? I can only guess that it somehow brings the cost down... but I like being able to safely say that there is no junk in what I feed my hens.

The Sprouting Instructions are simple:


  • Fill a jar (I use a two-quart jar for my 7 chickens) 1/3 full of wheat berries
  • Soak grains overnight in water (read here about how I dechlorinate my water for better germination of sprouts.)
  • Drain and rinse wheat once a day, letting as much water as possible drain out to allow sprouts to grow (they shouldn't be immersed after the initial soak)

I generally have 5 or 6 jars going, at different stages of development, in order to give them time to green up before the chickens eat them. I feed the hens one jar every morning, rinse the 5 remaining jars, and start a new jar soaking that night. I store them on a cabinet shelf until the last two days of sprouting, when I put them on a sunny windowsill to produce chlorophyl. I give my chickens a second meal each afternoon, which is usually some combination of kitchen scraps. See my earlier post for making your kitchen scraps into something the hens will actually eat.


Chickens on our urban farm

I have also used feed quality oats for sprouting, which sprout faster than the wheat so you don't need to have as many jars going before they're green. When using oats you can fill the jar about 2/5 full, since they don't grow quite as much as the wheat. Any other whole grains or edible seeds will do for sprouted chicken feed, but oats & wheat are the least expensive organic grains I can find.

Any seeds or grains that you sprout for human consumption should be rinsed twice a day. This prevents bacterial and mold growth. For the chicken food, I don't think a bit of mold and bacteria bothers them, but if you want to keep their sprouts fresher feel free to rinse twice a day!


Below I'm linking to some relevant Amazon ads. Any purchases made through them helps support our family. Thanks in advance!

Read More

Monday, January 9, 2012

Make Your Own Kombucha

fresh bottled kombucha

There are many tutorials out there on how to make kombucha, but I have had enough people ask me for instructions that I decided it would be helpful to post how I do it. If you regularly buy kombucha, making it yourself will save you a fortune.

When I started growing the kombucha culture (often called the "mother" or "scoby") for the first time, I was very careful to have everything sterilized by immersion in boiling water. This may be a good idea until your kombucha is established, but I can say for sure that by the second week I was much more relaxed about sterility, and the kombucha has done just fine ever since. I also used to keep two gallon jars of kombucha going, not because I needed that much kombucha, but because if something were to happen to one jar, I would still have the other one. Well, my confidence in the ability of kombucha to thrive, or my ability to take good care of it, has grown- so I've gone to just keeping one gallon jar going.


Things you do want to be careful of: Always have clean hands, jars, bowls, and instruments when handling kombucha. It's a powerful culture, and once it's established it doesn't let much else grow, but it's always possible for it to get infected with something foreign. Pay attention to the smell, which should be clean and a bit vinegary, not rotten or foul in any way. The scoby itself can look very different and still be healthy, but if you have actual mold growing on it, it would be prudent to throw it away and start over. I have never had this happen though.


healthy kombucha scoby
A healthy scoby
I like to grow mine in a one gallon glass jar; you can use a repurposed pickle jar or an iced tea dispenser so you have a handy nozzle on the bottom when it's time to bottle it. It's best to keep the kombucha away from plastic or metal for storage, though it's fine to use a stainless steel pot to make the tea in, and a plastic funnel when bottling. The kombucha is so acidic that it will oxidize metal with prolonged contact, and leech nasty stuff out of plastic containers. A nice ceramic crock would also be great if you have one.


kombucha brewing

The process is simple:

Make a big pot of sweet tea using 3 quarts of water, roughly 2 tablespoons of loose tea (probably the equivalent of 5 teabags) and 1 cup of sugar (in these pictures I had used sucanat, which gives it a darker color and stronger flavor than plain sugar- but I've found I prefer to make it with a lighter colored sugar). You can also make a sweet ginger tea if you like ginger kombucha. I have read that kombucha needs to be made from black teas, but I've had great success using all kinds of herbal teas, and have come to the conclusion that any kind of sweetened infusion will work. Bulk organic teas are available at great prices from Mountain Rose Herbs or your local health food store.


kombucha tea, cooling

The sweet tea needs to cool down until it's just warm to the touch, and then you can combine it with your starter scoby and a cup or two of the mature kombucha in a nice big jar or crock. A good rule of thumb is to retain about 10 percent of your mature kombucha liquid to help inoculate the next batch. If you are adding water to top the jar off, I recommend using dechlorinated water, which you can easily make yourself. Just follow the link for instructions. 


The scoby will float to the top of the jar, and over the course of the next week it will probably double in thickness. You can let it get pretty thick; I take mine apart about once a month, either sharing the extra scoby with friends or chopping it up for my chickens. One woman dehydrates her extra large scobies and forms them into clothing. I am not kidding. Click here to see the Ted Talk about it.

Keep your jar covered using a dish cloth and a large rubber band to prevent flies from accessing it. Fruit flies will hover around it during their season, don't let them in. Store the jar out of direct light. The warmer the room is kept, the faster it will  mature. We keep our kitchen fairly cool and make a new batch of kombucha every week, just because that's an easy schedule to remember. You might try your kombucha sooner than that to see if you like the flavor earlier. Too early and it will  be too sweet, but if you let it go too long it will be very strong and vinegary.


bottled homemade kombucha

I bottle our kombucha in German beer bottles, the ones with wire bound stoppers. Ours were purchased from a local brewery supply store. They form a nice strong seal, which helps the kombucha in it's final stage of fermentation: carbonation. Some people like to bottle their kombucha, store it at room temperature for 24 hours until it's fizzy, and then store it in the fridge so they can drink it cool. Storing it in the fridge keeps it from fermenting any further. I don't have a lot of fridge space, and find it easier to simply bottle it and stick it in a lower, dark and cool kitchen cabinet. I do store a bottle or two in the fridge so we can drink it chilled, but the rest keeps in a cupboard just fine for many weeks. In the fridge it might last indefinitely. If you don't have German bottles, screw top jars also work, though they'll only carbonate if you can get a very tight seal.


There are many things kombucha can be used for besides just a refreshing beverage. Kombucha works as a starter culture for many other fermentation projects. A bit of kombucha in some flour will kick-start a sourdough starter, for example (click here to see how). Kombucha can also be mixed with flour into a dough, and left for 12-24 hours to help the grains become more digestible. This can then be mixed up into pancake or muffin batter, or cooked as a hot cereal. Check out my recipe for a delicious, easy soaked grains breakfast cake, made with kombucha-soaked flour. I put about 2 cups of kombucha in our green smoothies as well.


The health properties of kombucha are beyond the scope of this article, but the information is widely available. To put it briefly, kombucha is one of many fermented drinks traditionally made all over the world to aid digestion, increase energy, and reduce sickness. You may prefer yours diluted with some water, since it can be pretty strong full strength. However, if you make it with a tea that you like, and find the right balance of sugar and fermentation time, you will end up with a drink that is not only good for you, but light and bubbly, and a pleasure to drink!


For more information on the benefits and history of kombucha, as well as a whole world of fermentation ideas, check out the original source of my inspiration, two books by Sandor Katz. Both probably available from your local library, but also definitely worth owning. If you buy either through my ad links below, Amazon gives me a tiny bit of cash. Thanks in advance!


Read More

Sunday, January 8, 2012

Homemade Kitty Litter

kitten on raw meat diet

When we got our kitten a year ago, my mom very kindly gave us a little starter kit of some toys and a box of Arm&Hammer kitty litter. Nothing on the box said it was scented, but that stuff stank! I think people would rather smell just about anything than poo, but no one is really fooled- if you have a dirty litter box, some nasty perfume does not hide this fact. Perfumes are also composed of molecules that are toxic to humans and the environment and are best avoided.

Also, the standard clumping litter can wreak havoc on the internal organs of kittens. No, they should not be eating the litter per se, but they do lick every inch of themselves as part of their grooming ritual, including between every toe so they  can thoroughly remove those pesky clumps of kitty litter. This can cause a toxic amount of litter to get into their little systems: the clumping, dehydrating action of the litter is extremely bad for their health, and can cause death. Additionally, standard cat litters don't biodegrade, so produce more waste for landfills.


As handy as I found it to be able to scoop our kitty's pee cleanly away, I did not think it was worth putting up with the smell of perfume or risking the health of our kitten for my convenience, so I began researching more natural cat litters. It turns out there are many varieties, with of course a steeper price range for these alternative litters. There are all kinds of alternatives out there with various clumping abilities, so we went to our local pet store and spent about $16 on a ten pound bag of their wheat can litter. As frugal as we are, I wanted something that worked and something that wouldn't harm the cat.


Imagine my surprise when I dumped it into his freshly washed litter pan to discover that this expensive wheat kitty litter is literally just a bag of coarsely ground wheat. No magic ingredients. It wasn't even organic. Feeling a bit foolish since this expensive litter was nothing we couldn't have made ourselves for a fraction of the cost, I vowed next time to make my own.


bulk whole wheat
Bulk whole wheat, available from health food stores, makes a simple, sustainable cat litter
Directions:

You can use a grain grinder on a coarse setting, or simply blend up some wheat berries until it's the consistency you want. I have found that the finer I grind the wheat, the better it clumps, but you don't want it to be as fine as flour because that would be a bit dusty to have around. I try for a coarse meal, but the exact grind doesn't matter too much. 


Also, even though we are not eating it, we still choose to buy organic wheat because it's important to support sustainable farming practices whenever we can, and this is a very affordable way to do that. We buy organic animal-grade wheat (animal-grade means it hasn't been cleaned to the standards we expect for human consumption) from Azure Standard. It costs us $14.20 for 50 lbs: less than 1/5 the cost of store-bought wheat cat litter! Any wheat berries will do, they are also available in bulk at your local natural food store. I love that when his litter pan is low, I can simply grind some wheat up and toss it in.


homemade kitty litter
This batch also has some whole feed-quality oats mixed in, which works fine too.
It's very simple to grind, the cat is just fine with it, and it can be composted or tossed in the yard waste pickup. Flushing even natural cat litter is discouraged because it contributes to toxoplasmosis in aquatic mammals. If you are pregnant, don't handle it or garden with compost made from cat litter. It can also safely be buried several inches below the ground. Your plants will love it. Our cat spends most of his time outdoors, so I only need to remove waste from the litter pan once or twice a week. If you have an indoor cat you would probably need to do it daily.


our happy cat

Below I'm linking to some relevant Amazon ads. Any purchases made through them helps support our family. Thanks in advance!
Read More

Friday, January 6, 2012

Unschooling Life

Every once in a while I read a book that changes everything, and Parenting a Free Child by Rue Kream is one of those. Before reading this book, I would have said our kids are already free, certainly compared to the majority of kids who are in school all day long, being told what to do and when. We unschool, so aren't enforcing any kind of curriculum on the kids at home, while they happily learn all day long doing activities for the most part of their own choosing. Nik & I are very flexible and we only make rules that make sense and are in the children's best interest... but we make SO many rules! Apparently I am something of a control freak; it always seems simple and efficient to declare a rule about something from on high, but rules made in this way are solely intended to make adult lives easier. They do nothing for the kids except to make them feel controlled. Resentment builds in relationships where one party exerts dominance over the other.

This book reminded me that it's possible to trust kids to make the right choices, that if you discuss things with them and give them respect, they will be respectful. Children are wise and kind and lovely, they are not ignorant and rude and needing to be controlled.


happily unschooling

One issue I have had with how I saw "radical unschooling" was that I didn't like anyone saying there is one right way to unschool. Every family is different, and I saw unschooling as a way of meeting the needs of each family in whatever way works for them. Radical unschooling, however, seemed to have a narrower definition and a lot of rules to follow in order to "do it right". Rules like: no bedtimes, no limits on candy or TV, no telling the kids what to do, ever. These were not things I felt like would be advantageous to our family.


I still have an issue with unlimited junk food and TV. They are both designed to be highly addictive, and both are pretty much bad for you. We don't think it's reasonable to eliminate sugar--they go out in the world and want to eat what their friends and family are eating, and we don't make a big deal about any of it. Also, the kids have a huge supply of Halloween candy that they enjoy organizing, counting, and collecting. They currently have a deal that Nik & I came up with (after reading this book, in the future we will come up with these arrangements with the kids, not for them) where they get 1 hour of screen time each day, and they can trade it for up to 3 pieces of candy if they choose to. Although they have total access to the candy, they never eat it inappropriately, which I think shows that they feel the arrangement is very reasonable. It gives them a lot of control over their choices each day. I know that Loki likes having a limit on candy, because it ensures that they won't run out before next Halloween, and that is an important goal for him.


I'm not ready to let go of the restraint on screen time. It's something Nik & I will have to explore with the kids in the future. I grew up on sitcoms, and I feel that between school and television, that was many years of my life wasted.


our unschooled child

The other issue I had with radical unschooling was that it seemed like parents were expected to give up their responsibility as parents. (And, yikes, to give up control.) To frolic with the kids instead of making sure their teeth got brushed, to follow every whim of the child instead of teaching responsibility. What this book has reminded me, though, is that you don't have to make top-down rules in order to teach anything. The only thing rules teach is that kids can't be trusted to follow their own intuition, planting the idea that children are bad and will go astray if left to their own devices. In addition, they grow up worrying about breaking rules, or if they're not particularly keen on following rules, they worry about getting caught. Neither state enhances your parent-child relationship in any way.

Rules from a position of power are always for the grownup, and only give the appearance of being effective. What works in the long term is coming to decisions together; if our kids help to make informed decisions about how something is to be done, how a toy is to be treated, what to eat, or whatever, they are going to feel better about the whole thing, rather than looking for a way around the rule or feeling resentful for being told what to do.


So if it's not the parent's job to create and enforce rules, what's left for us to do? Is this not just a lazy parenting method? On the contrary, this parenting method is about saying yes to our children, and most of what children want from us is our time and attention and love. This is important work, and it's not the "easy" way. It feels right for all involved though. So often when we make a rule that gets broken, or when we have a plan that the children won't go along with, people are left feeling like bad parents or bad children. What is the use of creating this feeling in your family? Parenting a Free Child reminds us that we need to be trusting partners with our children, that it helps to be close and loving, that being friends with your kids should be our greatest aspiration rather than something to avoid in order to maintain control.


My plan from here is to avoid making arbitrary rules, and when a change or a decision needs to be made we will discuss it together and do what makes sense. My goal is to reassess every "have to" as it comes up, and redefine it. There are so many times each day when Nik or I will declare that we as a family "have to" do something. Our kids trust us, only occasionally grumbling about stuff we make them do but always going along, so we feel like our current methods mostly work-- but reading this book has made me realize that our lives could be more joyful, loving, and free if we make less decisions for our kids and discuss things with them more, as the rational, loving, reasonable, caring people that they are.


unschooling with love

Beyond issues of control, this book really reminded me of another aspect of parenting: just loving my children... watching them be who they are without judging or correcting; letting them grow without determining their path; trusting.

I didn't realize how liberating it would be to embrace these principles. I mean liberating for me, not just for the kids. As a small but poignant example, this morning as Odin ate his toast he called to me while I was in the bathroom, saying "I didn't want the crust on my toast!" Well, in the past I would have considered it my job to remind him that he should really be eating his crusts so we don't waste food, bla bla bla. I have always thought it was ridiculously picky for kids to not eat their crusts, and have a hard time with that behavior in my own kids. However, Odin always resists compulsion. It's one of his greatest strengths, and one of the biggest sources of my challenge in parenting him. Here is my liberation. I don't have to compel him to do anything. It's OK if he chooses not to eat his crusts. It is better that he feels responsible for his own choices in life, not forced by me to do what I have decided is right.  So this morning, after reading and discussing the ideas in Parenting a Free Child, I answered Odin with an idea rather than a "should". I said, "Can you eat around the crusts, then?" And you know what? When he was left to make his own decision, to work it out for himself what he thought was right or yummy, he ate those crusts.


Coercive or controlling language backfires. With Odin it is readily obvious. He walks away, closes up, or tears up when his freedom is infringed upon. My older son, Loki, is less obvious about how this coercion bothers him, but I know the resentment builds inside him. He tries to do what we want him to do, because he likes us, but it gets old always doing what you're told! What kids really need is for us to want them to be themselves, to just support them in that, and not try to form them to our own molds. This is something I am finally getting; we are all learning all the time.


Below I'm linking to some relevant Amazon ads. Any purchases made through them helps support our family. Thanks in advance!

Read More