Showing posts with label Raw. Show all posts

Monday, April 3, 2017

How To Make Lacto Fermented Ginger Carrots

A Life Unprocessed

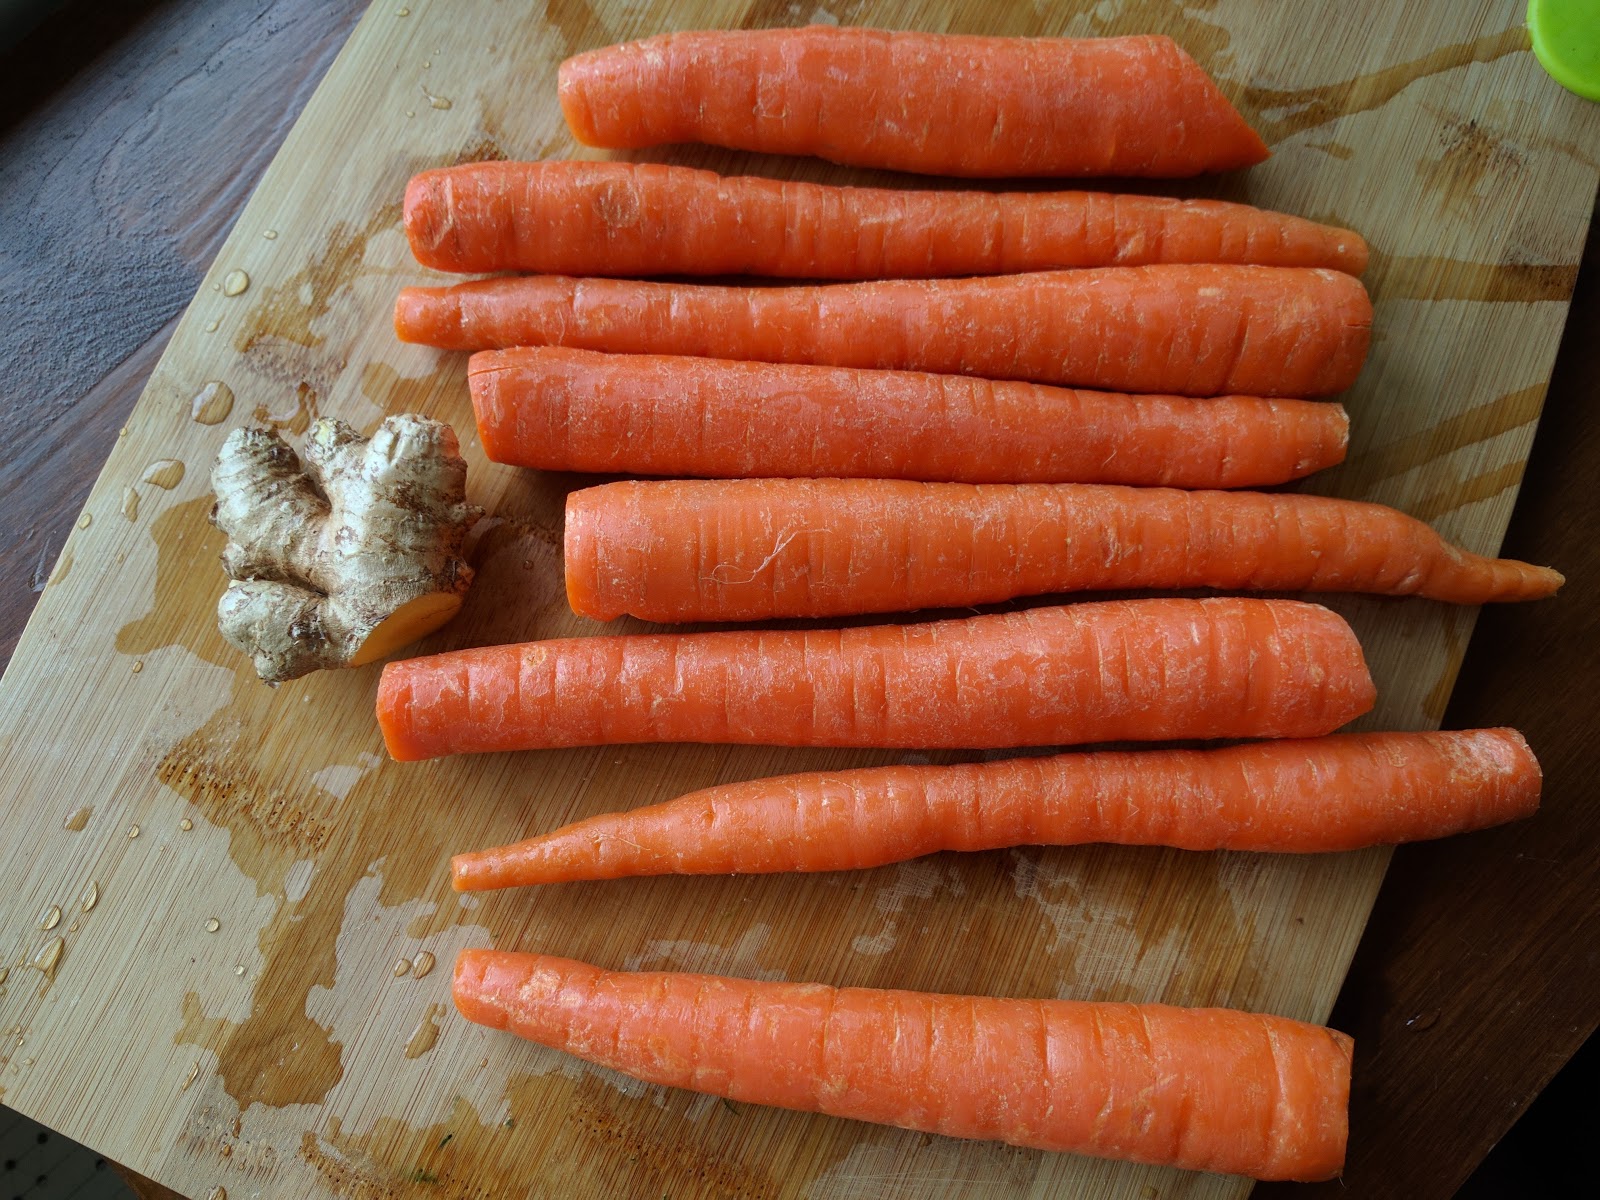
Buying raw lacto-fermented condiments gets crazy expensive. Ginger carrots are not only delicious and easy to make yourself, they will cost you the low price of some carrots and a nub of ginger.

Ingredients:
  • 1 lb carrots
  • 3" section of ginger
  • 2 tsp sea salt


A Life Unprocessed

First, wash your carrots and cut the ends off. Likewise, make sure your ginger is clean and free of bad spots. As you may know from my previous article, I never peel my veggies. It's a waste of time and you lose precious nutrients.

A Life Unprocessed

Run the carrots and ginger through a food processor with a shredder attachment. The carrots help push the ginger through, so run the ginger through first, and then the carrots. If you don't have a food processor, a low-tech cheese grater works fine too.

A Life Unprocessed

Transfer the shredded veggies to a mixing bowl, and add the salt. I usually mix my sauerkraut by hand and really squeeze the salt into the cabbage, but for the carrots it works fine to use a stand mixer and just thoroughly mix everything. Let sit, so the salt can start to dissolve and break up the cell walls of the veggies, and then mix again. The carrots should release a bit of juice. This is our brine.

A Life Unprocessed

Stuff the mix into a wide-mouth quart jar, or two pint jars if you prefer. I have a wide funnel that helps fill the jars with less mess, but it's not necessary. Pack it down so there's no air mixed in with the carrots, and the liquid rises to the top. I discovered that the small ladle, shown below, helps me to pack the veggies in. But if you don't have something like that, your clean fingers will work fine. Just try to remove the air pockets, and get all the shredded veggies pushed below the level of the brine. It's OK if the brine sinks back down and some of the carrots aren't fully covered by the juice. They will be fine during the short fermentation time.

A Life Unprocessed

I like to cap mine loosely with a plastic lid, since metal will corrode over time, with exposure to the acids in fermented veggies. Store them at room temp, in a dark spot, with the caps loose. I put mine on the counter near my stove, covered by a tea towel.

A Life Unprocessed

Ferment for 2-4 days, testing it out each day to see how you like it best. Ginger carrots take much less fermentation time than traditional sauerkraut. The high sugar content of the carrots makes it kind of a different animal, with a much shorter shelf life. It's best to make small batches, only what you will use in the next two weeks. You will know when it goes bad if you see white spots on the carrots at the top, or if the consistency turns slimy. Just don't forget about it in the back of your fridge, and it will be fine, since it is so delicious you will want to use it up long before it has a chance to go bad! My partner and I just ate half a batch in one meal, with our curry and rice. Fortunately, it's easy and quick to make a new batch!

A Life Unprocessed

For more on making your own fermented vegetables, check out my other articles: Easily Make Sauerkraut Right in the Jar, and Making Lacto-Fermented Sauerkraut.


Please check out the following links if you're interested- any purchases made through my link help support our family. Thanks in advance!


Read More

Saturday, April 1, 2017

Miner's Lettuce: Growing and Harvesting the Most Delectable Wild Greens

A Life Unprocessed

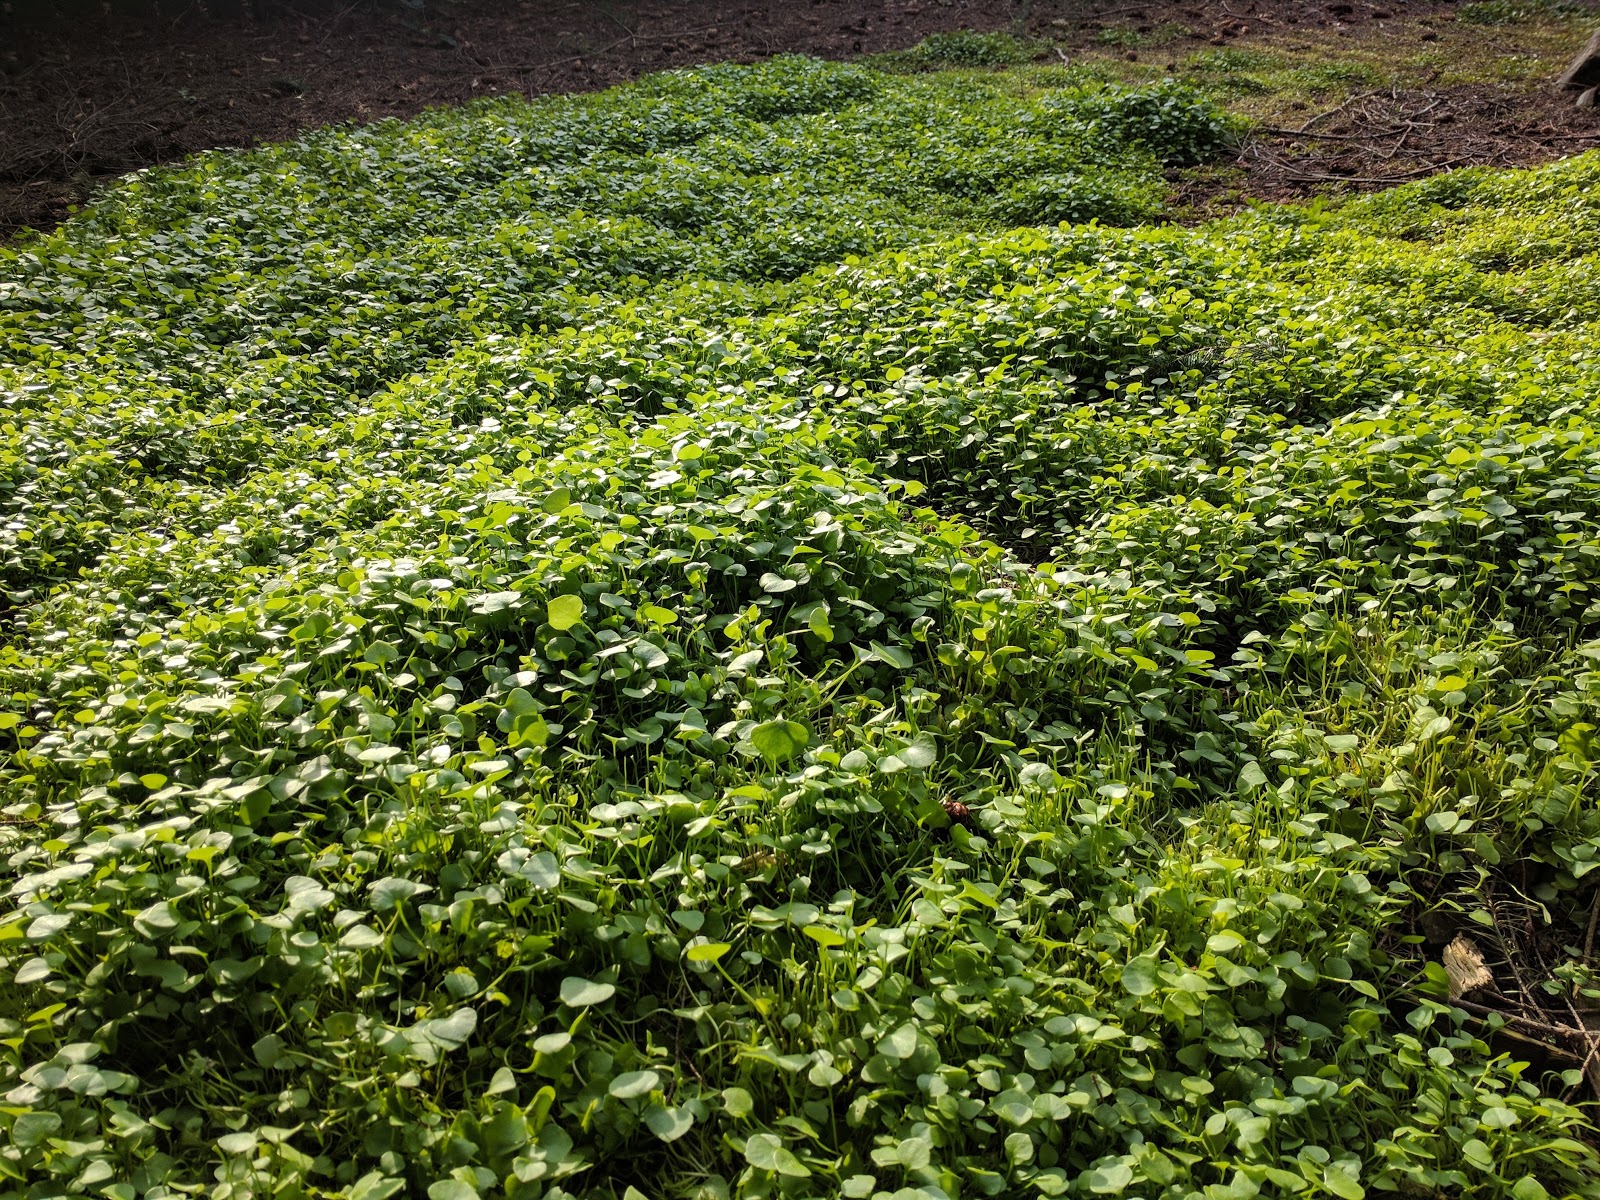
Each morning for the past few weeks I've been harvesting a giant bowl of this tender wild green vegetable, right from my backyard. We use it in our green smoothies instead of spinach or kale (click here for my green smoothie recipe) and in salads instead of buying the mix of salad greens that I would normally get. It has a really mild flavor, which makes it suitable in anything you'd use raw spinach or lettuce for. I've never tried cooking it, but it would probably cook up like spinach as well.

A Life Unprocessed

Nearly two years ago, when we bought our house, the only thing I was sad about was losing my rich abundant garden full of wild edible weeds and plants, which I had cultivated over the years that we'd been at our first house. I had to trade all that flora and fauna for a yard that consisted of evergreen trees, shade, landscape fabric, and woodchips. I knew not much would grow in the new, dark yard, but I brought a tub with some miner's lettuce that I dug from my old place, and just laid it down over the wood chips and pine needles that covered my new yard. I watered it pretty regularly that first summer. Here we are two years later and it's taken off like wildfire.

A Life Unprocessed

This perfect edible weed now thrives deliciously on my poor, unamended soil, with no watering beyond what the clouds provide, and only an hour or two of sunlight at the end of each day. I haven't really managed to grow much else in the deep shade of my yard, but fortunately the miner's lettuce loves it! 

A Life Unprocessed

Besides that first summer of watering it in, it took absolutely no work (or expense!) to grow this healthy and abundant food crop. I love it! Whenever I want some greens, I simply go outside with a big bowl and a large pair of scissors. Holding the tops of a handful of greens with one hand, I clip them off near the base with the scissors. They will quickly grow back. The entire plant is edible, though the leaves get a bit tougher once they start flowering in summer. 


After cutting all I need, I bring the bowl inside and fill it with cool water and a dollop of white vinegar. We have pets, and washing our miner's lettuce with a bit of dilute vinegar makes me feel better about food safety, since who can say where the pets are doing their business. The taste or smell of vinegar does not linger on the greens. I drain the greens and refrigerate any portion that I'm not using right away. They last a few days in the fridge, but I tend to use what I pick each day. Fresh greens are such a delicious and healthy luxury!

For more of my articles on edible foraging, check out Wild Foraging in April, Identifying and Harvesting Edible Weeds in the Garden, and How to Find Edible Weeds.

Please check out the following links if you're interested- any purchases made through my link help support our family. Thanks in advance!
Read More

Friday, August 12, 2016

How To Peel A Mango


How To Peel A Mango - A Life Unprocessed

It's the saddest thing to me, when someone doesn't like mangoes because they seem like too much of a hassle to eat, since there's no obvious way to peel them, and they have that big pit. I think mangoes are the most glorious fruit on earth. I have a couple of techniques for peeling them and removing the pit; one that I grew up with, and one that I learned as an adult and now prefer. I'm going to show you my favorite way, which takes me no more than a minute to execute, and hopefully eating mangoes won't seem like such a chore. As some readers have pointed out, this is the method that gets your hands messier. But it's fun! I'll show the other method soon!

How To Peel A Mango - A Life Unprocessed

First, be prepared for some juice. Depending on the ripeness and variety of mango, there can be a lot of liquid released while you work. I like to use a plate to catch the delicious juices that are released during the peeling process, rather than having liquid running all over my cutting board.

How To Peel A Mango - A Life UnprocessedHow To Peel A Mango - A Life Unprocessed

With a sharp knife, slice just a couple millimeters deep all the way around the mango, from the stem end back around until the slice comes full circle. Then turn the mango 90 degrees, and cut again in a full circle, just through the skin, until you have four separate sections of peel.

How To Peel A Mango - A Life UnprocessedHow To Peel A Mango - A Life Unprocessed

Starting from the bottom of the mango, take a corner of the sliced peel and lift it up and away from the fruit. It can be as easy as peeling a banana. Sometimes the peel will cling more to the fruit, and sometimes it tears a bit as you work, but just do the best you can, repeating the process with all four segments of the peel. You can always flip the mango over and work from the other end if that seems easier.

Once all the segments of skin are removed, you can use a knife to cut away the stem and any peel clinging to the mango anywhere. Peeling the entire thing takes under a minute, and then you are left with a gorgeous golden orb... Now, to get the pit out:

How To Peel A Mango - A Life Unprocessed

Holding the mango on it's end, slice down each side of the pit. The pit is long and flat, like a disc in the center of each fruit.

How To Peel A Mango - A Life Unprocessed

 Once the pit is separated, you can cut more fruit off of it easily.

How To Peel A Mango - A Life Unprocessed

Eventually you will have two large mango sections, plus several smaller pieces from the ends of the pit. It gets super easy with practice. 

How To Peel A Mango - A Life Unprocessed

Fresh mango is great on its own, in fruit salads, with yogurt and granola, or as a topping for pancakes or waffles. Enjoy!


Please check out the following links if you're interested- any purchases made through my link help support our family. Thanks in advance!


Read More

Tuesday, May 24, 2016

Your Healthy Morning Cup of Chocolate

Your Healthy Morning Cup of Chocolate

I remember when I first read that people used to drink a cup of hot chocolate every morning. How deliciously opulent! I thought. How unhealthy!

But of course we now know that dark chocolate is nutritious and rich in antioxidants, good for your heart and shown to be protective against cancer. It's the sugar, which chocolate is generally paired with, that is not so healthy. And when it comes to hot chocolate, specifically, most people are still drinking instant hot chocolate mix. It's easy because you can just open a packet and add water, but it's basically lacking in any health benefits, packed with sugar or artificial sweeteners, powdered milk, and often even artificial flavors. The original cup of chocolate in the morning was free of this health sapping crud. Here is how to make your own rich, healthful beverage for seemingly decadent mornings.

First of all, if you like black coffee this is going to be exceptionally easy. Simply take a mug of hot water and stir in a generous spoonful of unsweetened chocolate powder; bakers' chocolate or raw cacao powder both work. Drink up and be amazed. It's better than coffee, in my humble opinion, and still has a bit of the caffeine kick that makes it a good morning drink.

If you prefer things a bit more sweet, you of course can sweeten this simple chocolate drink however you want to, and add any kind of milk you like. For my own hot chocolate, I mixed 4 parts cacao powder with one part unsweetened carob powder. Carob is naturally sweet, and cancels out the bitterness of dark chocolate nicely. If I have some kind of milk or cream, I add a dollop. This mix is lovely. I don't drink coffee these days, and with this dark, rich beverage I really don't miss it.

Your Healthy Morning Cup of Chocolate

Below are Amazon Affiliate Ads. Any purchase made through them helps support our family. Thanks in advance!

Read More

Sunday, April 10, 2016

How to Make the Perfect Fresh, Delicious, Healthy Pesto

How to Make the Perfect Fresh, Delicious, Healthy Pesto

Pesto is a mainstay in my kitchen. Not only does it pack a ton of flavor, it is a nutritional powerhouse. The simple ingredients, including basil, garlic, olive oil, nuts & seeds, and sea salt, are pretty much all superfoods. Read about garlic's anti-cancer, prebiotic, and other health benefits here. The nuts and seeds in the recipe include walnuts and hemp seeds; both are rich in essential omega-3 fatty acids. They help to mellow out the bite of the raw garlic, making this an extremely palatable way to eat a lot of this healthy plant. Check out this link to read more about basil's nutritional benefits, including its antibacterial and anti-inflammatory properties. And of course olive oil is well known for its health benefits; follow this link for the specifics. This recipe is completely raw, so it's great for anyone on a raw foods diet or cleanse.

Pesto is so delicious and good for you, and with my recipe it's very easy and affordable to make large amounts yourself and have it on hand anytime. While pesto does freeze well, I find I can make several jars of it at a time and they'll keep in my fridge for at least a few weeks. You can top off the pesto with a bit of olive oil in order to prevent the discoloration from oxidation. Personally, if I stick things in my freezer I'm likely to forget they exist; things stored in my fridge are way easier to keep track of. If you grow basil and harvest a ton of it at once, excess can definitely be frozen or canned for long term storage.

Don't limit your pesto use to just the typical pasta and pizza! I find I can put it on just about any savory dish that needs a little salt and flavor boost. It's great on savory sandwiches, on crackers with cheese or other toppings, with rice and fish, or as a salad dressing.

Without further ado, the recipe, which makes about a half quart of pesto:

Ingredients:
4 oz fresh basil
4 to 8 cloves garlic
1/2 c raw walnuts
1/4 c hemp seed hearts
1 tsp sea salt
1 c olive oil, more as needed for blending


First, de-stem your basil. Simply pinch off the leaves, discarding the tough stems and any brown leaves. Place in a blender.
A Life Unprocessed
A Life Unprocessed
This recipe uses 4 oz of basil, because it comes in these handy and well-priced tubs at our local grocery. You can easily double the batch, depending on how much basil you have on hand, and how much you love pesto.

Peel your garlic cloves. They can be added to the blender without chopping if using a high speed blender.


A Life UnprocessedA Life Unprocessed

Add sea salt. I find one teaspoon is safe. I overdid it on the salt when I made one batch, and my family was a little scared of my pesto after that. Since that experience, I feel like it's better to undersalt it than use it too liberally.


Add nuts and seeds. You can mix and match as much as you want. Traditional pesto uses pine nuts, but I prefer raw walnuts and hemp seeds, both for their flavor and nutritional profile. You should add a total of 1/2 c to 1 c nut/seeds. 


A LIfe UnprocessedA Life Unprocessed


Add oil. Extra virgin olive oil is traditional. Walnut oil and pistachio oil also make delicious pesto. 

Blend all ingredients. You might need to pause and stir, to get everything incorporated. More oil can be added to assist blending, but once you get the proportions right, it will blend up into a smooth green pesto.


How to Make the Perfect Fresh, Delicious, Healthy Pesto


What's your favorite way to use pesto? Please share your ideas in the comments below!

While you can make this pesto in a standard blender, this and many of my other recipes really benefit from the power of a high speed blender. I don't go a day without using my Blendtec, often twice. Once you try a truly powerful blender, you will never go back! I'm posting the ad link below to my beloved Blendtec, as well as the other leading brand, Vitamix, for comparison. Please check it out if you're interested. Every purchase through my link helps provide us with a little bit of income.

Read More

Tuesday, October 6, 2015

How to Preserve the Other Half of that Avocado

half avocado

Because sometimes you just don't want a whole avocado all at once. Don't get me wrong; I can eat an entire avocado with my eyes closed. But often I'll use only half to garnish a salad or soup, or spread on some crackers. And I want the rest to still be good later.


When I was a kid we'd just tuck half in the fridge, with some plastic wrap on it or slipped inside a sandwich bag. It invariably had completely browned on top by the time we got back to it.


cut avocado

The method I use these days is painless, mindless, and all too simple: 

  1. Cut your avocado in half, and use the half you need. 
  2. Don't remove the pit from the half you want to save. Leave it intact.
  3. Cover the saved half with the empty husk by balancing it on top. Just close it up like a lid of a box.
  4. Pop it in the fridge, and try to remember to use it within a day or two. 
It will stay green and delicious.


half avocado
Same avocado, the next day. Still appetizing!
What if you have a different problem, and find that you've sliced into an avocado that's not yet ripe? Don't worry, it's not wasted! Check out my technique here for ripening an avocado that's been opened already.

Below are Amazon Affiliate Ads. Any purchase made through them helps support our family. Thanks in advance!
Read More

Thursday, December 18, 2014

How to Make Delicious Raw Cashew Cream

cashew cream

Cashew cream is simply cashews blended with water, and it is creamy, rich and tasty, and incredibly versatile as it is. But, with the addition of a few basic, whole-food ingredients, it can be transformed into something quite divine.

Unlike other nuts, cashews don't really need to be soaked. They are soft enough that they will blend up pretty smooth in a high speed blender. However, if you're using a conventional blender, you will definitely want to soak them for about an hour prior to blending. Use the soak water right along with the nuts when you blend; it will be rich and flavorful. I still soak mine just to ensure maximum creaminess, even with the high speed blender.


You can sweeten cashew cream with soaked dates or raw honey, or stevia if you prefer. Go ahead and soak your pitted dates, if you're using them, right along with the cashews, in enough water to just cover.


ingredients for cashew cream
Vanilla, coconut oil, cashews, and honey. These four ingredients are the main players in my cashew cream. Feel free to mess around with the recipe though; you can't go wrong.

The addition of a dollop of raw coconut oil, with all its richness, mild but delicious flavor, and wonderful melting properties is really what makes this particular recipe fantastic. You don't need to use too much- a little is quite noticeable in the final texture. 

Finally, a dash of vanilla extract will give the cashew cream more depth of flavor. Try making your own with this recipe.


Directions for the Cashew Cream:
 
soaked cashews
For small amounts of cashew cream, our little Nutri Bullet works perfectly. This is about 1 C cashews. Whatever device you blend in, be sure the liquid level is above the cashew level, for easiest blending.
make cashew cream
Add a tablespoon or two each of sweetener and coconut oil, depending on how sweet you want it, and a teaspoon of vanilla extract, or half a vanilla bean.
make cashew cream
Blend until it turns into this amazing goodness. I want some right now. Refrigerate after blending. The coconut oil will solidify the cream when it's cold, and then it will melt wonderfully when dolloped on something warm.
cashew cream on cake
It melts deliciously on warm pie, cake, or baked french toast.
cashew cream on toast
Also, try it on regular toast, instead of butter and all that. My son likes to just eat it with a spoon. Anything goes with this stuff.
Interested in upgrading your blender? While cashew cream can be made with any old blender, it really turns out more smooth and creamy with the power of a high speed blender. I don't go a day without using my Blendtec, often twice. Once you try a truly powerful blender, you will never go back! I'm posting the ad link below to my beloved Blendtec, as well as the other leading brand, Vitamix, for comparison. Please check it out if you're interested. Every purchase through my link helps provide us with a little bit of income.


Read More

Monday, March 31, 2014

Easily Make Sauerkraut Right In The Jar

I've been making my own sauerkraut for years, but for a long time I used a more complex method involving a large crock, the perfect size plate to fit inside it, a heavy jar to weigh it down, and a tea towel over it all. It's really not too hard to set up once you have the right size crock and plate, but in my small kitchen it was annoying to have this large contraption taking up space while it fermented for 3 weeks. Plus, checking the sauerkraut along the way to see if it was done was an involved process each time.

Here is the method I've been using for the past year or two, with great success. It's way easier and quicker, and when the sauerkraut is done it's already in jars, so there's no messy repacking.

lacto-fermented sauerkraut
This batch of spicy cortido kraut has celery, carrots, cabbage, beets, fresh oregano, and jalapeno.
I start with about 5 lbs of veggies and 3 Tb of sea salt. I usually use one big head of cabbage, plus a handfull of whatever other veggies I want to try. Things that I've found work great are carrots, celery, beets, daikon radish, kale, and onion. In smaller amounts I add stronger flavored ingredients, like hot peppers, garlic, ginger, oregano, and seaweeds. When adding dried seaweeds, soak them first to rehydrate, and reduce the salt a bit. Variety makes sauerkrauts more interesting, nutritious, and tasty!

shredded vegetables for sauerkraut
The lovely mixture of shredded veggies
Simply chop or shred all veggies and combine with the salt. I mix with my hands to massage in the salt and bruise the veggies a bit, to help them start to break down and release their water.  I wear gloves to protect myself from the sting of hot peppers. You can save spicier additions like peppers and onions to stir in after the salt has been massaged into the other veggies, if you're not protecting yourself with gloves. 

slicing blade
I use the slicing blade on cabbage and greens...
shredder blade
... and this blade on root veggies.
After massaging in the salt, let the mixture sit for a few minutes, massage again, and you should notice a lot of liquid has been released. This water (brine) will be added to each jar along with the veggies. It's ready to jar up and start fermenting! 

shredded veggies for sauerkraut
After mixing with the salt, veggies will release their water. This batch has arame seaweed.
Stuff veggies by the handful into clean, wide mouth mason jars. You will probably need 3 quart jars, or 2 quarts and one pint size jar for 5 lbs of veggies. Press the veggies deeply into the jars, both to bruise the veggies further and to remove any air pockets from the kraut. It's best if the jars are filled just to the "shoulder", about 1" below the top, so that there is room for them to bubble and expand a bit. I frequently overfill them, and liquid seeps out. Which is fine, but I'd rather it stay put.
 
After pressing the veggies deeply into the jar, top off with the brine. Try to distribute the liquid equally between the jars, with the goal of covering the veggies with brine. Using a spoon or clean hand, press all the kraut as much as possible below the level of the brine. If necessary, extra brine can be mixed up to top off the jars. Simply mix salt and water (about a teaspoon of salt per cup of water) and pour over kraut. I have never needed to do this, because I find the veggies always provided enough liquid on their own.

lacto-fermented sauerkraut

OK, your work is done here. Screw some lids on those jars and let them ferment for anywhere between 1 and 3 weeks! Yes, that is a huge window. It's up to you to decide when they're done. I find it's perfectly good at any point along that continuum; some people like their krauts a little more fresh and crispy, and others like a more mature, softer kraut. For the first few days, fermentation will be very active, and it's best to open the jars enough to release pressure once a day.

Open the jars at least once a week to check for signs of mold (remove any you see with a clean spoon) and press any veggies back under the brine that have strayed. Taste a pinch of veggies each week. Once they're done to your satisfaction, transfer them to the fridge. They'll continue to mature in the fridge, but at a much slower rate. Kraut will last for many, many months under refrigeration. I've even kept it in my cool, dark, garage pantry for about a year and it was still perfectly good.

Sometimes the top layer of the jar will discolor from oxidation; you can discard this layer if you find it unappealing. My chickens gobble up discolored kraut with impunity. An off color does not mean it's gone bad, it's simply oxidized.


For more on the benefits and history of sauerkraut, as well as a whole world of other fermentation ideas, check out the original source of my inspiration, two books by Sandor Katz. Both probably available from your local library, but also definitely worth owning. If you buy either through my ad links below, Amazon gives me a tiny bit of cash. Thanks in advance!


Read More