Showing posts with label Recipes. Show all posts

Tuesday, March 17, 2020

Easy Grain Free Sandwich Bread


This striking loaf is incredibly easy to whip up in the blender, and if you use a base of sunflower seeds, your bread ends up a marvelous dark green color. Impress your family & friends!

The green is a natural chemical reaction between the sunflower seeds & baking soda, and absolutely safe. The batter looks like normal bread dough, but as it bakes it changes color. You can use other nuts; cashews & almonds will provide a normal colored loaf, if that's what you're after. I like sunflower seeds because the green is fun, plus they're much cheaper. And isn't there enough brown bread in the world? On to the recipe!

A Life Unprocessed

There is no prep. Simply place the following in the blender:

8 eggs
1/2 c milk of any kind, unsweetened
1.5 Tbsp apple cider vinegar
450 g sunflower seeds or other nuts (2.5-3 cups)
2 tsp baking soda
1 tsp sea salt

Blend into a smooth, thick batter. Then add 7 Tbsp coconut flour. This may become a little too thick for the blender to handle, as bread dough should. You can transfer it to a mixer for this last step, or just stir it by hand. No kneading required, just mix the flour in thoroughly.

A Life Unprocessed

Bake at 325, in an oiled standard bread loaf pan, for at least an hour. I have also divided the batter between two loaf pans. This will bake more quickly, but give shorter loafs/smaller slices. Either way works; you do you. Just pay attention towards the end of baking. You can do a toothpick test to see if the center is baked.

Let cool in the pan for 30 minutes, and store any leftovers in the fridge.


Below are Amazon Affiliate Ads. Any purchase made through them helps support our family. Thanks in advance!
Read More

Saturday, March 30, 2019

The Easiest Instant Pot Yogurt You'll Ever Make

A Life Unprocessed

Straining yogurt is a hassle. It's a messy, extra step that people use to get a nice, thick yogurt. But you don't need to do it! With this simple technique, you don't have to. My yogurt is always thick, delicious, and really hassle free. By the way, I have made yogurt without a kitchen thermometer, but it's much easier to be sure you are doing it correctly with this tool, so you might want to pick one up or borrow one from a neighbor before you get started. Also, you'll need a pressure cooker with a yogurt function, and the metal steamer insert that comes with it.

Ingredients:
  • 1/2 gallon of whole milk (or three cans of coconut milk, blended smooth)
  • 1 tsp unflavored gelatin or collagen powder (this helps to ensure thickness without straining!)
  • 1 tsp yogurt, saved from a previous batch (if storebought, make sure it has active cultures) You can save your yogurt starter in small jars in the freezer and then thaw before using, or just scrape the jar from your previous batch in the fridge.

Whisk milk with gelatin or collagen powder together in your instant pot liner. Set instant pot on "Yogurt" and hit adjust, if needed, until screen says "boil". Cover with lid and when it has reached 180 degrees it should notify you. Here is where I use my thermometer to double check that it has reached 180 degrees. If it hasn't, simply set your IP to saute for a minute or two, and whisk to keep the milk from sticking to the pan, until it measures 180. This step will improve the texture of the finished yogurt.

Next step is to remove the liner from the IP, and place it in a sinkfull of cold water to cool the mixture. You can add some ice to the sink to speed this process. (Make sure water & ice don't get into your milk pot.) Whisk the milk and check the temperature; it is safe to add the starter once it reaches 110 degrees. The best way to add the starter is to first whisk about a half cup of the cooled milk mixture with your starter in a small bowl or jar, and then incorporate that into the pot.

Finally, you are ready to jar up your yogurt mixture. Culturing yogurt in directly in jars, rather than in the pot and then transferring it later, helps it to firm up properly. Make sure your jars will fit into the instant pot with a steamer tray in the bottom. You can use four pint jars, or one half gallon jar if you IP is large enough. Place lids on the jars; it will not get hot, so plastic lids are OK. Wash out your pot, add 1 cup of water to the bottom, and place jars on the steamer insert. With the IP on Yogurt function, hit adjust as needed until it displays "8:00". Your yogurt will be ready in 8 hours!

A note on timing: Because it takes 8 hours, it's best to either start your yogurt in the evening, so it can be finished in the morning, or start the process in the morning and let it culture all day. Your yogurt will last a couple weeks in the fridge. I think you'll find it's so good, and really so easy, that you never need to buy it again.

Please check out the following links if you're interested- any purchases made through my link help support our family. Thanks in advance!


Read More

Sunday, March 4, 2018

Grain Free Sugar Cookies With Buttercream Frosting


This fantastic, easy recipe will impress your family & friends. Anyone who thinks of gluten free cookies as being a dry and punishing experience will disabuse themselves of that notion after their first bite. These coconut flour based cookies are rich and buttery, and so delicious. The frosting is equally rich, and a perfect adornment. Both are quick to whip up, and not at all fussy.

Sugar Cookies:

  • 1 stick of butter (1/2 c) softened to room temp
  • 1 cup sugar (I used a xylitol/natural sugar blend)
  • 2 eggs
  • 2 t vanilla extract
  • 1/2 t sea salt
  • 1 c coconut flour (4.25 oz or 128 g, if you have a scale and want to be more exact)
  • 1 t baking powder
  • 2 tb arrowroot starch, plus more for dusting

In a large mixing bowl, cream butter & sugar. Add eggs, vanilla, and salt and beat together well.
In a measuring cup or small bowl, stir baking powder into the coconut flour to combine. Pour into batter and mix well. Let sit for 5 minutes so the coconut flour can absorb the liquid. Add starch and mix again to knead dough for 30 seconds. If it is sticky or too moist, add more starch, up to 4 tb total.


Dust counter with starch and press or roll dough to 1/4" thick. Cut into desired shapes and bake at 350 for 8-10 minutes, until they reach your desired shade of golden. We found them to be delicious whether baked to a dark golden brown (shown at bottom of article) or a light gold (at top).


Let cookies harden for a few minutes before removing from the cookie sheet. Cool completely before frosting. I like to place them on a cutting board in the fridge, so they're chilled and ready for frosting in about 10 minutes.

Buttercream Frosting:

  • 1 stick of softened butter (1/2 c)
  • 1.5 c powdered sugar
  • 1.5 tb cream (from the top of can of coconut milk, or heavy cream)
  • 1 t vanilla extract
  • small pinch of salt
  • 1/2 packet of Color Kitchen plant based food coloring, if desired

Beat butter in mixer until smooth. Slowly stir in powdered sugar, then mix on medium until mixture holds together. Add cream, vanilla, salt, and color if using, and increase speed until everything is well mixed, scraping down the sides and bottom of bowl as needed. Frost cookies, then store them in the fridge. Any leftover frosting can be stored in the fridge for up to a week; just bring to room temperature before using.


Enjoy!


Below are Amazon Affiliate ads. Any purchase made through them helps support our family. Thanks in advance!
Read More

Wednesday, February 28, 2018

(Gluten Free) Pasta with Marinara in the Instant Pot


A Life Unprocessed


Cooking pasta in the Instant Pot is simple and rewarding, provided you use the right amount of liquid, and the right type of noodles. While you can definitely cook actual spaghetti in a pressure cooker, it has more of a tendency to clump together and remain crunchy than corkscrew fusilli. Fusilli noodles are a fun, helical shape, easier to fork than spaghetti, and hold onto the sauce better as well. We love the gluten free quinoa and brown rice fusilli that we've been using for years. It has more fiber & protein than traditional pasta, and I personally can't tell the difference in taste. 

Here's how to make pasta with marinara in an Instant Pot. This recipe is for a standard 6 quart model, but if you have an 8 quart pot, you can double the recipe. We generally use ground beef, but found that ground lamb makes a delicious variation. You can also easily make this a vegetarian meal by omitting the meat. 

  • 1 lb ground meat, if using
  • 1 diced onion
  • 20 oz fusili noodles
  • 24 oz tomato sauce
  • 2 c broth or water
  • 5 cloves minced garlic
  • 2 t paprika
  • 2 tb Italian herbs (I use a blend of oregano, sage, thyme, and rosemary)
  • 1 tb sea salt

A Life Unprocessed

Saute meat and onions in the IP until brown. Saute onions in a little oil, if you are not using meat. I like to slide my Instant Pot under my stove's vent when I'm sauteing, as long as the surface of my stove isn't hot.

Once onions are soft and meat browned, add noodles and then everything else. Try to cover noodles with sauce and broth, but if a few stick out that's OK. Cover, then set to manual for 4 minutes. Let it release pressure naturally (NPR). Once you can open the lid, give the pot a good stir to incorporate the meat, onions, and spices.

A Life Unprocessed

Serve and enjoy! I love to eat this sprinkled with fresh parmesean, or my homemade sauerkraut, and gomasio seasoning.

We purchase our wonderful noodles and organic tomato sauce directly from Azure Standard, a natural foods distributor. Below are affiliate links for Amazon. Any purchase made through the links helps to support our family, without any additional cost to you. Thanks in advance!

Read More

Wednesday, January 31, 2018

Peanut Butter & Yogurt Dip

This easy to make dip is a crowd pleaser. Feel free to use any nut butter you like, but peanut butter is definitely my kids' favorite. It's amazing as a dip for apples, as you can see, but it's also a delicious topping for pancakes & waffles. Use your imagination and let me know what other creative uses you come up with for this versatile dip.

A Life Unprocessed

It's pretty good for you too; although this time I made it with some corn syrup that had been sitting around in my cabinet for a hundred years, I would normally make it with raw honey. You can use whatever sweetener you feel good about. I used chunky peanut butter; creamy nut butter will yield a slightly more uniformly smooth product.

A Life Unprocessed

Recipe:

  • 1 c cream cheese
  • 1 c plain yogurt
  • 1 c peanut butter
  • 1/2 c honey or syrup

Blend all ingredients together until smooth. Taste, and add more sweetener if desired. This time, I made it with "light corn syrup" which doesn't seem to be as sweet as honey, so I ended up adding more. Powdered sweeteners will work as well; feel free to use whatever you have.

I used goat milk yogurt but any kind of yogurt will be fine. If you are using sweetened yogurt, you won't need as much honey.

A Life Unprocessed

It keeps for at least a week in the fridge. This makes a fairly large batch, so you can always halve the recipe if you don't want so much. Or, make the full recipe and then freeze some for later.

Enjoy!
Below are Amazon Affiliate Ads. Any purchase made through them helps support our family, without any additional expense to you. Thanks in advance!
Read More

Saturday, September 16, 2017

Grain Free Easy Paleo Biscuits


These are the easiest biscuits- It just takes minutes to whip them up.
With recipes like this, I really never miss bread! They go great with any soup, and we also like them with butter & jam. Plus, it's a great use for coconut flour, which was a complete mystery to me for many years :)

They pretty much turn out perfect every time, and my kids love them.
This recipe makes about a dozen medium sized biscuits, and is easily doubled if you like. Here you go!

Preheat oven to 350.
In a blender or mixing bowl, combine:
  • 6 eggs
  • 1 Tb apple cider vinegar
  • 1/2 tsp sea salt
  • 1/2 c coconut oil, butter, or other fat, softened


    Stir together, then add to blender:
    • 3/4 c coconut flour
    • 1 tsp baking soda


    Mix in blender briefly, until thick dough forms, like this photo:


    Drop heaping spoonfuls onto lightly oiled baking sheet.
    Bake for 15 minutes, or until golden.


    Serve warm with soup, or with butter & jam. Enjoy!


    Store cooled biscuits in a sealed container in fridge for up to a week.


    Please check out the following links if you're interested- any purchases made through my link help support our family. Thanks in advance!


    Read More

    Monday, April 3, 2017

    How To Make Lacto Fermented Ginger Carrots

    A Life Unprocessed

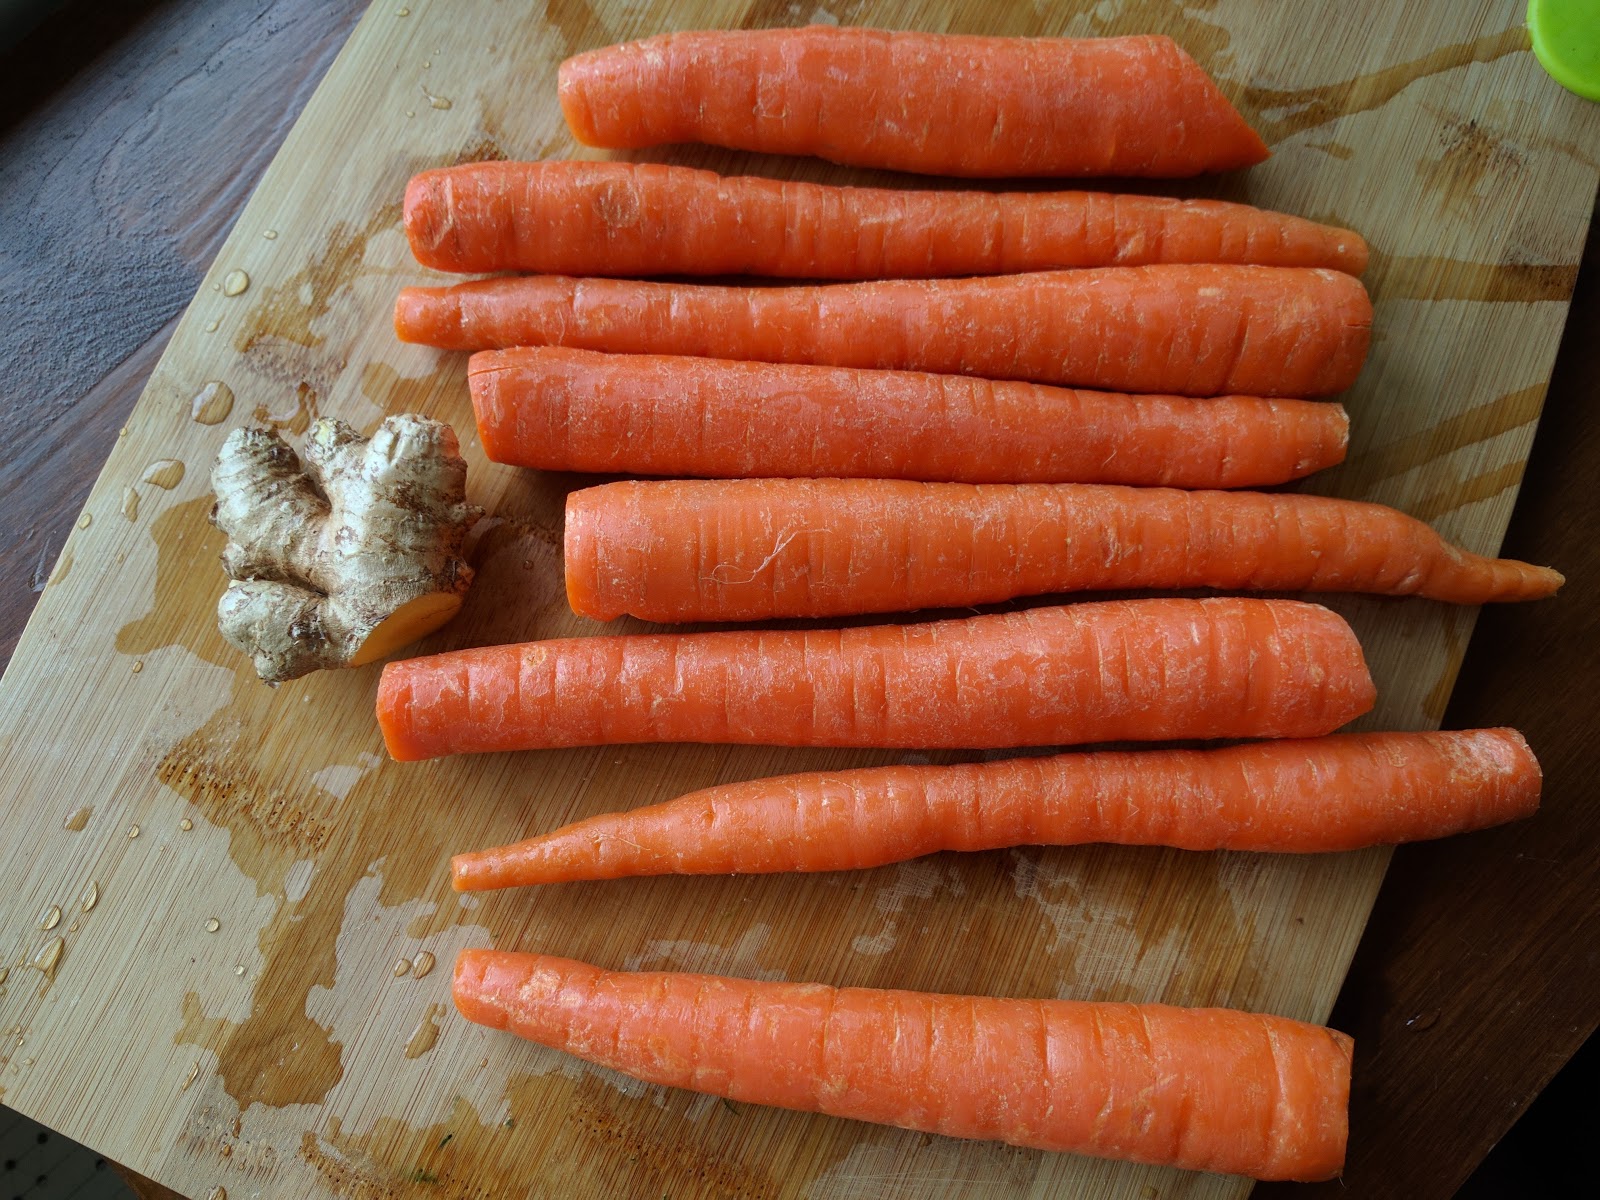
    Buying raw lacto-fermented condiments gets crazy expensive. Ginger carrots are not only delicious and easy to make yourself, they will cost you the low price of some carrots and a nub of ginger.

    Ingredients:
    • 1 lb carrots
    • 3" section of ginger
    • 2 tsp sea salt


    A Life Unprocessed

    First, wash your carrots and cut the ends off. Likewise, make sure your ginger is clean and free of bad spots. As you may know from my previous article, I never peel my veggies. It's a waste of time and you lose precious nutrients.

    A Life Unprocessed

    Run the carrots and ginger through a food processor with a shredder attachment. The carrots help push the ginger through, so run the ginger through first, and then the carrots. If you don't have a food processor, a low-tech cheese grater works fine too.

    A Life Unprocessed

    Transfer the shredded veggies to a mixing bowl, and add the salt. I usually mix my sauerkraut by hand and really squeeze the salt into the cabbage, but for the carrots it works fine to use a stand mixer and just thoroughly mix everything. Let sit, so the salt can start to dissolve and break up the cell walls of the veggies, and then mix again. The carrots should release a bit of juice. This is our brine.

    A Life Unprocessed

    Stuff the mix into a wide-mouth quart jar, or two pint jars if you prefer. I have a wide funnel that helps fill the jars with less mess, but it's not necessary. Pack it down so there's no air mixed in with the carrots, and the liquid rises to the top. I discovered that the small ladle, shown below, helps me to pack the veggies in. But if you don't have something like that, your clean fingers will work fine. Just try to remove the air pockets, and get all the shredded veggies pushed below the level of the brine. It's OK if the brine sinks back down and some of the carrots aren't fully covered by the juice. They will be fine during the short fermentation time.

    A Life Unprocessed

    I like to cap mine loosely with a plastic lid, since metal will corrode over time, with exposure to the acids in fermented veggies. Store them at room temp, in a dark spot, with the caps loose. I put mine on the counter near my stove, covered by a tea towel.

    A Life Unprocessed

    Ferment for 2-4 days, testing it out each day to see how you like it best. Ginger carrots take much less fermentation time than traditional sauerkraut. The high sugar content of the carrots makes it kind of a different animal, with a much shorter shelf life. It's best to make small batches, only what you will use in the next two weeks. You will know when it goes bad if you see white spots on the carrots at the top, or if the consistency turns slimy. Just don't forget about it in the back of your fridge, and it will be fine, since it is so delicious you will want to use it up long before it has a chance to go bad! My partner and I just ate half a batch in one meal, with our curry and rice. Fortunately, it's easy and quick to make a new batch!

    A Life Unprocessed

    For more on making your own fermented vegetables, check out my other articles: Easily Make Sauerkraut Right in the Jar, and Making Lacto-Fermented Sauerkraut.


    Please check out the following links if you're interested- any purchases made through my link help support our family. Thanks in advance!


    Read More

    Friday, January 13, 2017

    How to Cook Beets in an Instant Pot


    If you have an Instant Pot, or any other brand of electric pressure cooker, you should definitely start cooking root vegetables with it. Not only is it extremely easy, but everything made in a pressure cooker somehow tastes better. Using broth as the cooking liquid, as I do here, takes it to a whole new level.

    I often cook beets, sweet potatoes, and red potatoes at the same time. They can be cooked whole, if you want them intact, or halved, for a bit of a quicker cook time. Today I'm cooking only a pound of beets, but these simple instructions will work just as well with a full load of mixed root veggies, say, a pound of each type.


    To start, wash your beets, and cut off anything you wouldn't want to bite into. I never peel vegetables, since it seems like a waste of both time and nutrients. Slice in half if desired. Very large beets should be cut down so that everything going into the pot is relatively the same size.

    Into your pot, pour 1 cup of broth. Any broth you like; I use homemade bone broth. Steaming veggies over broth gives them such amazing flavor and richness, and you can use the remaining liquid for whatever recipe you want after the beets are cooked (though it will be red!) It would not be criminal to drink it like it was hot tea.

    Place cut beets on a steamer tray over the broth, or if using them whole, they can be cooked on the trivet that comes with the Instant Pot. Cook on manual for 12 minutes if halved, 16 if left whole (times can vary depending on size and how soft you want them, but it's safe to experiment! You can always pop them in for another minute if they're not as tender as you want them). I generally prefer to use NPR (natural pressure release) rather than QR (quick release). This way it's hot and ready whenever I feel like opening the pressure cooker. But if you need your food more quickly, QR works, just add another minute to the cook time and release the steam right when it beeps.


    They taste amazing, no additional seasoning needed. But of course flavor them however you like! They make a great side dish on their own, or can be sliced and added to salads or other dishes. Or, you can just eat them one after another like candy, which is what I did while writing this article ;)


    Please check out the following links if you're interested- any purchases made through my link help support our family. Thanks in advance!

    Read More